
Houses are used to set up the houses that exist on the farm. At least one bin must be defined on the house for feed deliveries. The Farm must be created before any houses can be set up.
The following items must be defined prior to creating farms.
The new House creation process consists of two tabs:
 button to create
a new house record.
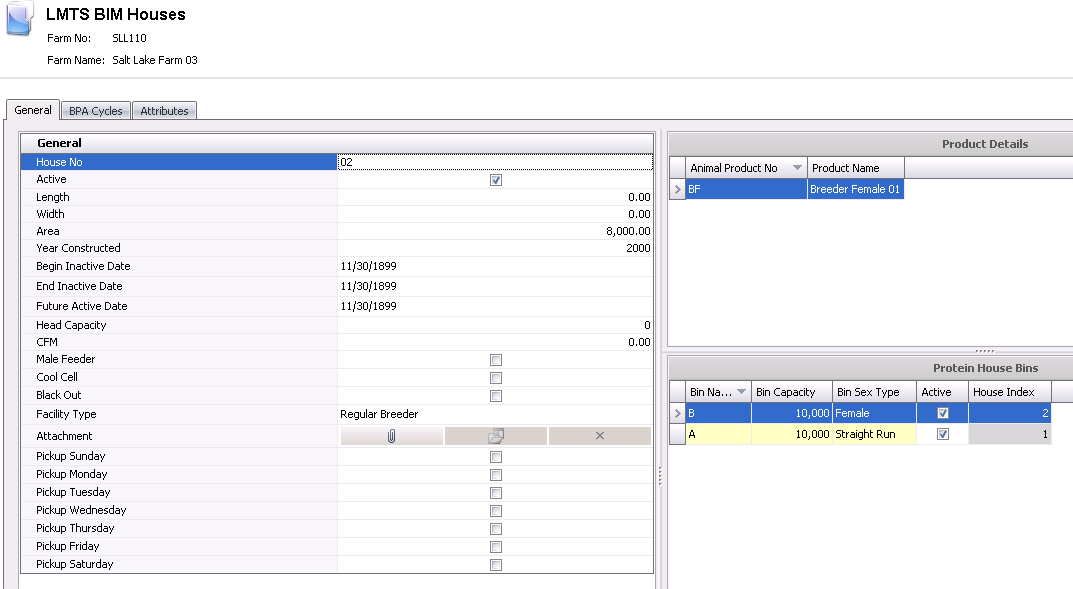
The General tab is used to enter the basic details for the house. There are three components in the General tab:

Length indicates the length of the house, and is an optional field. Length can be entered in feet, yards or meters depending on the unit of measure used by the division.
Width indicates the width of the house, and is an optional field. Width is entered in feet, yards or meters depending on the unit of measure used by the division.
Area is a calculated field that calculates the area in ft2 or m2 for the house. Area = Length x Width. Area is required for BPA Planning and is manually entered.
In the Year Constructed field, enter the year that the house was built.
The Begin/End Inactive Date fields are used if the house is gong to be inactive for a period of time. If so, enter the date the house will become inactive in the Begin Inactive Date field, and the last day the house will be inactive in the End Inactive Date field.
Future Active Date indicates the date the house will become active again. Enter the date, if applicable.
Head Capacity defines the head capacity for the house. Head Capacity is used for planning purposes, and is required for BPA Planning.
The CMM or CFM field is optional and indicates the measurement for airflow in cubic feet per minute, or cubic meters per minute.
Select the Male Breeder field if male breeders are located in the house.
Select the Cool Cell flag if cool cells are located in the house.
Select the Black Out flag if the house is used for blackout in the molting process.
From the Facility Type drop-down menu, select the house facility type. Available options are: Dedicated Stud, Regular Breeder, Sex Separated or Single Stage.
In the Attachment field, any type of file can be attached. (Example: Word document, picture, music or video clip).
The Pickup Sunday-Saturday fields are used to define when pickups are normally done at the house.
 to
add a new house bin.
to
add a new house bin.Enter the bin feed Capacity. This can be entered in either lbs or kgs.
From Bin Sex Type, select the sex type for the feed bin. Available options are: Male, Female or Straight Run.
The Active flag will be selected by default and indicates if the house is available and used in placements or production. De-select the flag if the house is no longer available.
House Index is an automatically-assigned reference number for the house.
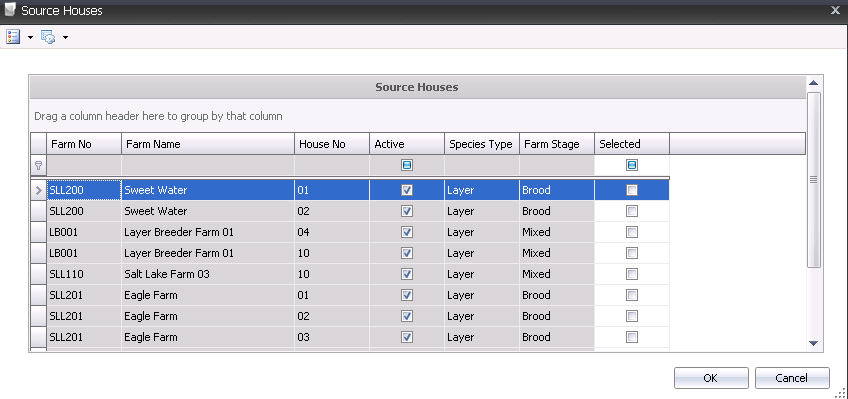
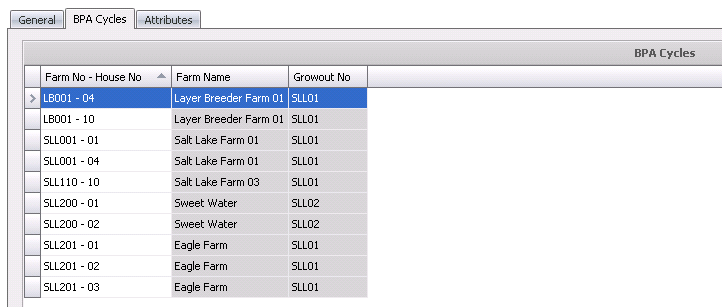
BPA Cycles are used for BPA planning. The BPA Cycles tab matches the Brood farms to the Lay Farms. On the Grow/Lay farms, enter the brood farms that can be moved to that grow/lay farm. If the brood farm is not in the list (BPA Cycles tab), it cannot be moved to the grow/lay farm.
 to add a new farm.

Attributes are assigned to farms and houses are defined in: Admin>Business>General>Definitions>Attributes. When a new entity is created, the attributes default in with an option for the user to modify.
