![]()
The Sales Order Planning screen allows the user to enter egg and chick orders in a grid style format. The order planning screen is in a calendar format that allows the user to easily move around orders if required. Alternatively, sales orders can be entered individually in the Sales>Orders screen.
Before creating an Order Planning screen, the following must first be created:
The Order Planning document is comprised of the following sections:
Click
on the  button and
a new line will appear in the HIM Order Planning grid.
button and
a new line will appear in the HIM Order Planning grid.
In the Order Planning screen, click
on the time and date required and then click to add a new line.
Order No will auto-populate when the order is saved.
In the Ship Date field, enter the date order will ship.
From the Customer (Ship To) drop-down menu, select the customer receiving the product.
Customer Name (Ship To) will default in.
From Cost Center No, select the cost center shipping the product.
Cost Center Name will default in.
Customer (Bill To) defaults from the Ship To customer.
Customer Name (Bill To) displays the name of the bill-to customer.
Products identifies the products being shipped.
In the Order Date field, enter the date the order was entered.
In the Delivery Date field, enter the date the product (s) is being delivered.
Number of Lines indicates the number of lines (items) in the sales order.
Earliest Delivery Date indicates the earliest date the product can be delivered.
Latest Delivery Date indicates the latest date the product can be delivered.
Process Sequence is a user-defined field that is used to prioritize the sales orders in the manner they are to be sourced and distributed on hatch day.
Pre Post Status will display as Posted or Active.
Posted - locks the order quantity and indicates that the order is available for shipment.
Active
- indicates that there could be changes in quantity. Active records
cannot be posted in the egg distribution. All orders must have a pre-post
status set to Posted in order for the egg
distribution to be posted.
Open
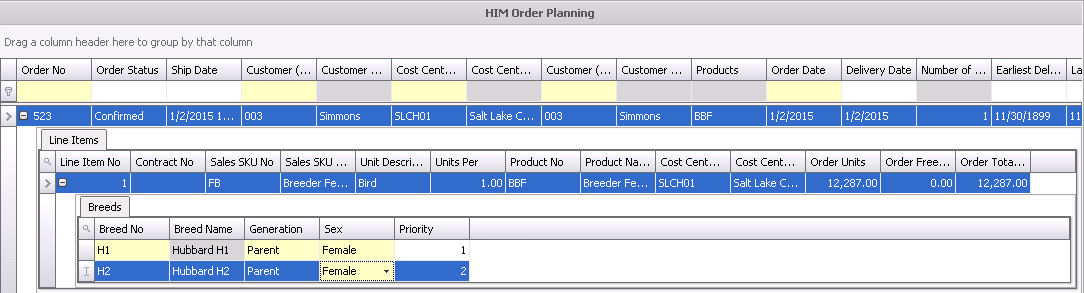
the child grid by clicking on the ![]() button in the Order No column.
button in the Order No column.
Set
the focus on the line item and click the button.
If the sales sku is assigned to a contract, the Contract No will default.
From the Sales SKU No, select the required add-on product.
Sales SKU Name will default in with a description of the product.
Unit Description will default in with a description of he product.
Units Per indicates the number of units per product item.
Product No identifies the product.
Select the Cost Center No.
Cost Center Name will default in.
Enter the number of Order Units.
Order Free Units will default in with any applicable free units.
Order Total Units displays the number of units ordered.
If a specific
breed has to be utilized for this order, then click the  button in the Line
Item No.
button in the Line
Item No.
Set
the focus on the Breed
No and click to
add a new breed.
Select the Breed No.
Breed Name will default in with a description of the breed.
The Generation of the breed will default in.
Select the Sex of the breed.
Enter the Priority for each breed. If there are multiple breeds that can source this order, enter `1` for the first breed priority and `2` for the second breed priority, etc. If only one breed is used, then Priority is optional.
The targets can be viewed in the calender once they have been created.
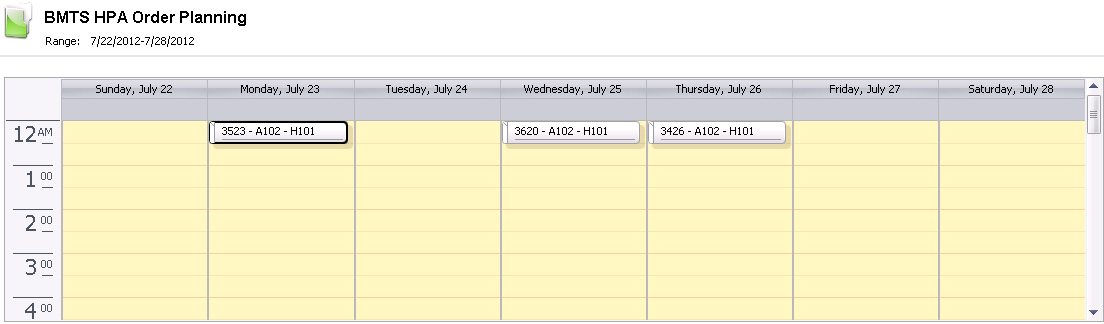

By right-clicking on the item and selecting 'Copy', the item can be duplicated by using the 'Recurrence' option.
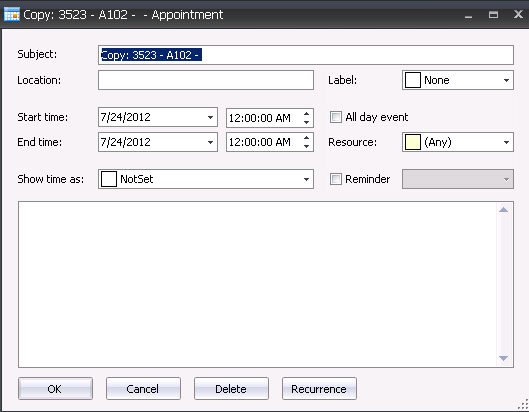

In the Range of Recurrence section, enter the Start Date.
Select the End Date. Available options are: No end date, End after (x amount of occurrences), or the End by date.
Click 'OK' and then in the Appointment dialog box, click 'OK' again.
Save and close the record.