gilts

Gilt Transfers are used when
transferring un-bred female pigs to a commercial sow farm or a gilt breeder.
Gilts, on average, are 8-9 months
old when they can be inseminated for the first time. The gilt becomes
a sow when she is inseminated.
There are eight types of gilt transfer transactions:
- Commercial
Gilt Breeder to Commercial Sow (Gilts)
- Commercial
Gilt Developer to Commercial Gilt Breeder
- Commercial
Gilt Developer to Commercial Sow
- Commercial
Sow to Commercial Sow (Gilts)
- Multiplication
Developer to Multiplication Breeder
- Multiplication
Developer to Multiplication Sow
- Multiplication
Gilt Breeder to Multiplication Sow
- Multiplication
Sow to Multiplication Sow (Gilts)
The Receiving Transaction
must be creating before a Gilt Transfer can be created.
The following components are outlined related to creating a Gilt Transfer
transaction:
Create
a Gilt Transfer
Header
The Header section contains the general information related to the transfer.
This section consists of three components:
- In SMTS>SIM>Movements>Transfers,
select Gilts.
- In the Gilt Transfers main index, select
 to create a new transfer.

General
- Click on the General
tab.
- From the Ship
To Customer No drop-down menu, select the ship-to customer.
- Select the Bill
To Customer No.
- Select the Delivery
To Customer No, if applicable.
- From the Movement
Type drop-down menu, select the source and destination stages
for the transfer. Available options are: Commercial Gilt Breeder -
Commercial Sow (Gilts), Commercial Gilt Developer - Commercial Gilt
Breeder, Commercial Gilt Developer - Commercial Sow, Commercial Sow
- Commercial Sow (Gilts), Multiplication Developer - Multiplication
Breeder, Multiplication Developer - Multiplication Sow, Multiplication
Gilt Breeder - Multiplication Sow, or Multiplication Sow - Multiplication
Sow (Gilts).
- In the Transaction
Date field, enter the date that the transfer occurred. This
date will be used for all inventory and accounting transactions.
- Event Date
defaults to the same date as the transaction date, and can be modified
if required. This date does not affect inventory or accounting.
- Ref No
is an automatically-generated unique number that identifies the transfer
transaction.
- Load No
is an optional field to assign a number to the load.
- Vendor No is an optional field to
assign a haulage vendor used for the transfer.
- Driver No
is an optional field to identify the internal driver used for the
transfer. Drivers must be set up prior in: Admin>Business>General>Definitions>Drivers.
- Vehicle No
is an optional field to identify the internal vehicle used for the
transfer. Vehicles must be set up prior in: Admin>Business>General>Definitions>Vehicles.
- Selecting
the Void flag will cancel
the transfer.
Amounts
- In the Start
Time field, enter the time that the animals will begin loading.
- In the End Time
field, enter the time that the animals will be finished loading.
- Gross
is an optional field to enter the gross weight of the load in lbs
or kgs.
- Tare is
an optional field to enter the tare weight of the vehicle in lbs or
kgs.
- Net is
an optional field to enter the net weight of the vehicle in lbs or
kgs.
- In the DOA
field, enter the number of animals that were dead on arrival, if applicable.
- Select the Truck
Wash flag to indicate if the truck was washed at exit.
- Select the Health
Paper flag if health papers were complete and sent with the
transfer.
- In the Comments
field, enter any additional information relating to the transfer.
Derived
The fields in the Derived tab default in from information entered in
the first two tabs - General and Amounts.
- Ship To Customer
Name displays the name of the ship-to customer.
- Bill To Customer
Name displays the name of the bill-to customer.
- Delivery To Customer
Name displays the name of the delivery-to customer.
- Vendor Name
displays the name of the vendor delivering the animals, if applicable.
- Driver Name
identifies the driver delivering the animals.
- Vehicle Name
identifies the vehicle used for the transfer.
- Order No displays the order number,
if applicable.
- PO No
displays the purchase order number associated with the transfer, if
applicable.
- Selecting the Void
flag will cancel the transfer.
- Creation Date
displays the date the transfer transaction was created.
- Last Modified
Date displays the date the transaction was last modified.
Destination
Details
The Source tab defines the entities from where the animals are being
transferred as well as the destination entities.
- In the Details tab, clickto
add a new source line.

- Select the Identity
Type. The following options are: Identified, Unassigned, Unidentified.
- From Source Farm
No, select or enter the farm where the gilts were transferred
from.
- Source Farm Name
defaults from Source Farm No and displays the name of the farm where
the gilts were transferred from.
- Select the Source
Animal Product No. This can not be selected if the identify
type is Identified.
- Source Animal
Product Name will default in.
- Source Animal
Type will default in from the selected source animal product.
- Sales SKU No
can be used to select the sales sku number of the product.
- Sales SKU Name
will default in from Sales SKU No.
- From Dest. Farm
No, select or enter the farm where the gilts are being transferred
to.
- Dest. Farm Name
defaults from Dest. Farm No and displays the name of the farm where
the gilts are being transferred to.
- Select the Dest.
Animal Product No.
- Dest. Animal
Product Name will default in.
- Dest. Animal
Type will default in from the selected destination animal product.
In the Head
Count field, enter the number of gilts that were shipped from
the source entity.
The Unit Price
will default in if internal pricing is used.
Price
will default in if internal pricing is used, and displays the total
price of the gilts.
Ref No
displays an automatically-generated unique reference number for the
transaction.

Enter
the average Weight of the
gilts that were transferred.
Enter the Time
that the transfer was completed.
Select the Shipped
Complete flag if the final transfer has been made from the
house. This clears the house inventory and moves the dollars
at period end.
Select
the Over-Stock Payment flag
if the
Employee No
is an optional field to identify the employee who performed the transfer.
Employees must be set up prior in: Admin>Business>General>Definitions>Employees.
Employee Name
will default in from Employee No.
Order No
identifies the order number of the transaction.
Shipment Line Item No..
Additional
Entities Details
The child grid contains details relating
to the Entities where gilts are being transferred from. Add a new line
for every entity.
- In the Identity Type field in the Details section,
click the child grid
 .
.
- In the Entities tab, clickto add a new source
entity line.
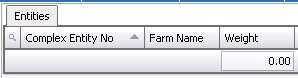
- From Complex
Entity No, select the source entity
- Farm Name
will default in.
- Enter the total Weight
for each entity. The weights must match the total weight entered in
the Details tab.
Post a Transfer
Once the Gilt Transfer as been created and saved, the transfer needs
to be posted. The posting process locks the transfer to prevent edits,
and creates a record or capitalization transfer to record the liability.
The UnPost option unlocks the transfer and reverses the record. A journal
transaction will not be created in the posting process unless there is
an internal price associated with the product that is being transferred.
At period end, the journal created from the internal price will be reversed
and the actual journals entered. If there is no internal price, there
are no journals until period end where the costs are transferred from
one flock to another
- In the Gilt Transfers main index, select the required
transfer and right-click to select 'Post'. Alternatively, click the
green check mark
 in the
top menu bar and select 'Post'.
in the
top menu bar and select 'Post'.
- To un-post a transfer record, select the required
transfer and right-click to select 'Unpost'. This process will
set the record status to 'Reversed' status, which allows the record
to be edited.