chick receivings

Chick Receiving is used when chicks are purchased using a purchase order.
The receiving document is a generalized document throughout the
system used for all receivings in the different modules. The Purchase
Order must be created and posted before a chick receiving can be completed.
The receiving farm/cost center will be designated during the purchase
order creation.
The following procedures are outlined in the Chick Receiving document:
Create a Chick Receiving
General
The General tab contains the base data to outline the chick receiving.
The tab is comprised of four sections, including grids and details, to
group the data. Most of the information, with the exception of the fields
in the General tab, is derived from the associated purchase order.
- In BMTS>BIM>Transactions,
select Chick Receivings.
- In the Chick
Receivings main index, click
 to create
a new chick receiving transaction.
to create
a new chick receiving transaction.
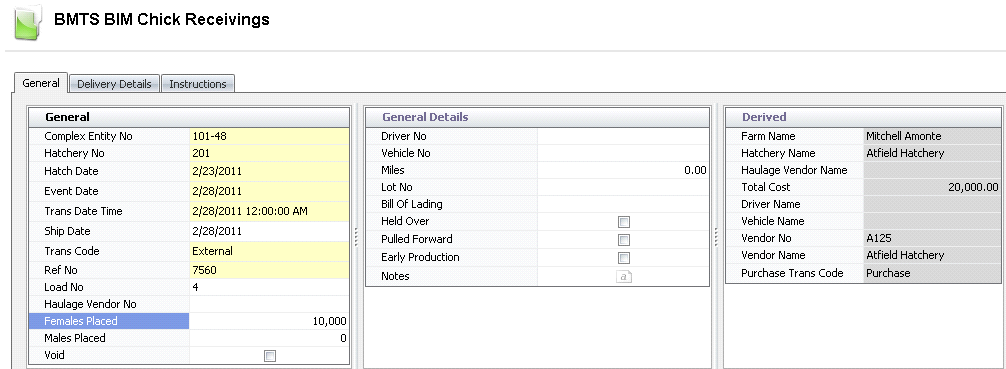
General
The General tab contains the details related to the receiving.
- Click on the General
tab.
- From the Complex
Entity No drop-down menu, select the farm where
the product will be received.
- From Hatchery
No, select the hatchery where the chicks are purchased from.
The hatchery must be setup as a vendor for this selection.
- In the Hatch
Date field, enter the date that the chicks were hatched.
- Event Date
will default to the same date as the transaction date, and can be
modified if required.
- In the Trans
Date Time field, enter the date the product will be received.
This date will be used for all inventory and accounting transactions.
- In the Ship Date
field, enter the date that the chicks were shipped.
From
Trans Code, select the type
of transaction. Available options are:
External
- The chicks are purchased from a vendor.
Internal
- The chicks are purchased from an internal source at cost.
Inventory
Change - Only head counts are updated.
- Ref No
is an automatically-generated unique reference number that identifies
the chick receiving transaction.
- Load No
is an optional field to enter a load number for the receiving.
- From Haulage
Vendor No, select the vendor that is transporting the product.
- In the Females
Placed field, enter the number of female chicks in the receiving.
- In the Males
Placed field, enter the number of male chicks in the receiving.
- Selecting the Void
flag will cancel the chick receiving.
General Details
The General Details tab contains optional fields to enter additional
information related to the receiving.
- Driver No
is an optional field to identify the driver that delivered the product.
Drivers must be set up prior in: Admin>Business>General>Definitions>Drivers.
- Vehicle No
is an optional field to identify the vehicle used to deliver the product.
Vehicles must be set up prior in: Admin>Business>General>Definitions>Vehicles.
- The Miles
field is used if the distances are defined from the farm to the hatchery,
in Farms. If distances are defined, the mileage from the hatchery
to the farm will be calculated.
- Lot No
is an optional field to enter the lot number for the transaction,
if lot tracking is used.
- Bill of Lading
is an optional field to enter a reference number on the shipping document
that identifies the transaction.
- Select the Held
Over flag if chicks are held over at the hatchery.
- Select the Pulled
Forward flag if chicks are hatched a day early.
- Select the Early
Production flag if the placement is sourced from early production
entities.
- In the Notes
field, enter any additional information related to the receiving.
Derived
The fields in the Derived tab default in from information entered in
the first two tabs - General and General Details. The fields cannot be
modified.
- Farm Name
displays the name of the farm where the chicks will be received.
- Hatchery Name
displays the name of the hatchery where the chicks are purchased from.
- Haulage Vendor
Name displays the name of the vendor transporting the product.
- Total Cost
displays the total cost for the product.
- Driver Name
displays the name of the driver delivering the product, if entered.
- Vehicle Name
displays the name of the vehicle used to deliver the product, if entered.
- Vendor No
displays the number of the vendor transporting the product.
- Vendor Name
displays the name of the vendor transporting the product.
- Purchase Trans
Code displays the type of purchase transaction.
Houses
The Houses section contains the details relating to the product being
received. Most of the details will default in with no option to modify.
- Click on the Houses
tab and select to create a new line detail.
- The Purchase Order Inventory dialog box will appear.
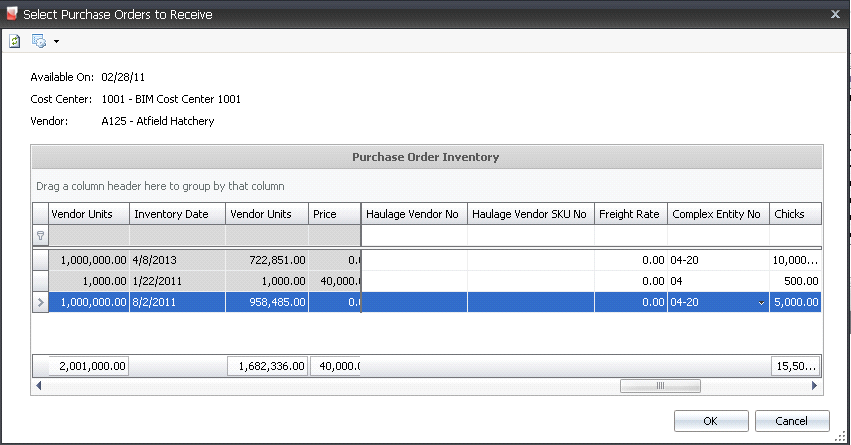
- Select the required purchase order from the list,
and from the Complex Entity No
drop-down menu, select the farm and house where the chicks will be
received.
- Enter the number of Chicks
to be received, and then click 'OK'.
- The details in the Houses section will default
in.

- Complex Entity
No indicates the farm and house where the product is being
received.
- Sex indicates
the sex of the product being received.
- Complex PO No
indicates the purchase order that is being received. Purchase orders
must be in 'Posted' status. Purchase orders will be filtered based
on the cost center and vendor selected in the header.
- Product No
displays the unique pre-defined number of the product that is being
received.
- Product Name
displays a description of the product being received.
- Vendor SKU No
displays the vendor sku of the product being received.
- Vendor SKU Name
displays the name of the product vendor sku.
- Units Received
indicates the number of units that are being received.
- Free Percentage
indicates the percentage of free birds received, and will be defined
on the Vendor SKU.
- Unit Description
displays the unit of measure in which the product was purchased from
the vendor.
- Units Per
indicates the number of units in each vendor unit.
- Head Placed
represents the net number of head being placed including free chicks
and less placement mortality. This figure must be balanced to the
house details.
- Price
is a calculated field. Price = Vendor Units x Unit Price.

- Total Add Ons
Price is a calculated total amount of the premium add-ons that
will be added to the vendor payment based on the amounts defined in
the purchase order. Details are located in the child grid.
- Total Discount
Price is a calculated total amount of discount add-ons that
will be deducted from the vendor payment based on the amounts defined
in the purchase order. Details are located in the child grid.
- Total Tax Price
displays the total calculated amount of taxes for the receiving line,
if applicable.
- Total Price
is the calculated total amount of the receiving transaction based
on the amounts that are defined in the purchase order.
- Head Free
will display the quantity of free chicks if there is a free percentage
add-on on the product.
- Plant No
assigns the processing plant to the receiving transaction. The number
defaults from the farm but can be changed if the entity will be processed
at a different plant.
- Placement Mortality
represents the chick mortality at placement. This field defaults in
from the farm, but can be changed if the entity will be sent to a
different plant.
- Total Quantity
is a calculated field. Total Quantity = Head Placed + Free Chicks
- Placement Mortality. This amount will be the beginning inventory
for the entity.
- If FDSA is being used, from Feed
Program No, select the feed program to assign for feed planning.
- Currency No
defaults based on the currency assigned to the purchase order as defined,
with no option to modify.
Currency Name displays a description
of the currency type.
Select
the Prepaid Final Receiving
flag if the order was prepaid and this is the last delivery or receiving
for the prepaid purchase order.
Additional Details
Within the Houses tab, there is a child grid with additional details
relating to the receiving add-ons. The details will default from the purchase
order.
The add-ons must be pre-defined in prior to adding to
the receiving transaction.
- Premium Add-on
- increases the cost of the product
- Discount Add-on
- decreases the cost of the product
- Click
 on the Complex Entity No field to display the child grid.

- Product No
displays the code of the selected add-on.
Product Name displays a description
of the add-on.
Transaction Basis is a read-only
field that defaults from the selected add-on and determines how the
add-on is calculated on orders. Options are: Per Unit, Percentage,
Flat Rate, or Free Percentage.
Payment
TypeTransaction:
Processed with the sales invoice.
Rebate: Processed at a date later than the invoice..
Internal: An internal transaction is a transaction that is not invoiced
to an external source (Example: There is an internal haulage
department that gets a credit for hauling products).
is a read-only field that derives from the purchase order and determines
when the add-on payment is made.
Payee Type is an optional field
that indicates the source type for the premium or discount add-on.
Transaction
Entity ID is a required field if a different Payee Type is
selected. If Payee Type is set, the selected vendor or cost
center name will appear in this field.
Pay Calculation
Type defaults from the vendor sku and determines the base amount
of the add-on calculation.
Product
Amount - the add-on is calculated based on only the product
amount and does not include any other add-on in the calculation
of the amount.
Net
Amount - the add-ons is calculated based on the net amount
of the transaction based on the product amount including other
add-on amounts, but excluding taxes.
- Vendor Calculation
Type determines if the payment is calculated based on
the base add-on logic using Transaction basis or if the add-on amount
is only deducted from the vendor payment.
Normal
- the add-on is calculated based on the rules established
by Transaction Basis and the Payment Type defined in the vendor
SKU and sales SKU.
Deduction
Only - the add-on is calculated based on the rules
established by Transaction Basis, however the add-on is only
deducted from the vendor payment.
Taxable identifies if the item is
taxable or non-taxable when the add-on is purchased. The flag will
be selected if the item is taxable.
Currency No defaults based on the
currency assigned to the purchase order as defined, with no option
to modify.
Currency Name displays a description
of the currency type.
Rate displays the total cost of
the add-on.
If the product and/or premiums/discounts are taxable, the tax code must
be assigned on the Taxes tab. The tax amount will then be calculated based
on the taxable order amounts.
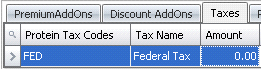
Protein
Tax Codes identifies the tax code to be applied to the product
and premiums/discounts for the selected line item. The Taxable flag
must be selected in the product and premiums/discounts for taxes to
calculate.
Tax
Name describes the selected tax code.
Amount
is the total amount of tax applicable on the product.
The Parent Details tab contains optional
fields that define the external sources for the placement. This data will
transfer to the entity for future reference. The parent details must be
balanced to the Total Quantity on the house detail line, and the external
sources must be defined prior to receiving the chicks. The majority of
the time, this information is not known when purchasing chicks, but it
can be requested if required.
- Click on the Parent Details tab and select to
add a new detail line.

- From Parent Entity,
select the source entity for the chicks placed.
Production
Date represents the production date of the eggs set for hatch.
The date will default to the number of incubation days prior to hatch,
with the option to modify.
Override Parent
Age is an optional field to enter a number that will override
the age of the entity.
In the Head
Placed field, enter the number of head placed for the source
entity.
In the Chick
Weight field, enter the average chick weight of the chicks
placed. Weight can be entered in lbs or grams.
In the Uniformity
field, enter the weight uniformity of the chicks.
Age
displays the age of the source entity on the production date of the
eggs set.
Breed No
displays the breed of the source entity.
% displays
the percentage of chicks from each Parent Entity. For example, if
100 females were purchased, and 50 of the females came from Parent
Entity X, the % would be 50%.
Delivery Details
The Delivery Details tab contains optional fields to enter details relating
to the delivery of the chicks. Many of the fields, such as temperature
and humidity recordings, will help identify the problem if a mortality
occurs on the delivery. The tab is comprised of two sections.
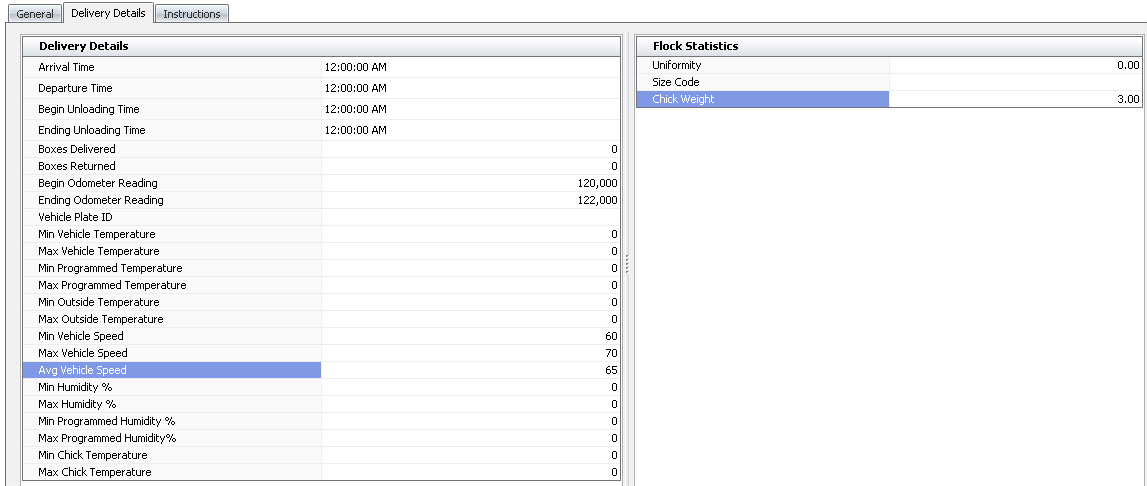
Delivery Details
- In the Arrival
Time field, enter the time that the delivery truck will arrive.
- In the Departure
field, enter the time that the delivery truck will depart.
- Begin Unloading
Time indicates the time that the product will begin unloading.
- Ending Unloading
Time indicates the time that the unloading will end.
- Boxes Delivered
indicates the amount of boxes unloaded at the destination.
- Boxes Returned
indicates the amount of boxes returned to the hatchery farm when chicks
are shipped to the customer in plastic boxes. This number will generally
be the same as the 'Boxes Delivered' number.
- Begin Odometer
Reading indicates the odometer reading when the truck
- Ending Odometer
Reading indicates the odometer reading when the truck
- Enter the Vehicle
Plate ID.
- The Min Vehicle
Temperature/Max Vehicle Temperature fields indicate the minimum
and maximum temperatures allowed inside the vehicle.
- The Min Programmed
Temperature/Max Programmed Temperature fields refer to the
programmed minimum and maximum programmed temperatures inside the
vehicle.
- The Min Outside
Temperature/Max Outside Temperature fields indicate the minimum
and maximum outdoor temperatures allowed.
- The Min Vehicle
Speed/Max Vehicle Speed fields indicate the minimum and maximum
speeds of the delivery vehicle.
- Avg Vehicle Speed
refers to the average speed of the delivery vehicle.
- The Min Humidity
%/Max Humidity % fields indicate the minimum and maximum humidity
levels allowed inside the vehicle.
- The Min Programmed
Humidity %/Max Programmed Humidity % fields indicate the minimum
and maximum programmed humidity levels allowed inside the vehicle.
- Min Chick Temperature/Max
Chick Temperature indicate the allowed minimum and maximum
temperatures of the chicks being received.
Flock Statistics
- Uniformity
represents the weight uniformity of the chicks.
- Size Code
is used to enter the applicable size code of the chicks being received.
There is no validation on the data entered in this field.
- Chick Weight
indicates the average weight of the chicks received. Weight can be
entered in lbs or grams.
Instructions
The Instructions tab is used to add additional instructions related
to the chick receiving.
- Click on the Instructions tab and select
 to
create a new instruction line.
to
create a new instruction line.
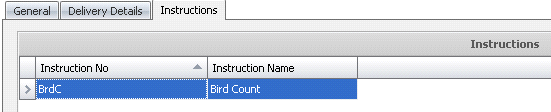
- From Instruction
No, select the required instruction.
- Instruction Name
defaults from Instruction No and displays a description of the instruction.
Post a Chick Receiving
Once the chick receiving transaction has been created and saved, the
receiving needs to be posted. The
posting process locks the chick receiving transaction to prevent edits,
populates the entities' fields with data, and creates the journal transaction
to record the liability. The UnPost option unlocks the receiving and reverses
the journal transactions. *Note: A Chick Receiving transaction
cannot be posted or un-posted if the entity has a corresponding Posted
Movement transaction.
- In the Chick Receivings main index, select the
required transaction and right-click to select 'Post'. Alternatively,
click the green check mark
 in the top menu bar and select 'Post'.
- To un-post a receiving transaction, select the
required transaction and right-click to select 'Unpost'. This
process will set the transaction status to 'Reversed' status, which
allows the transaction to be edited.
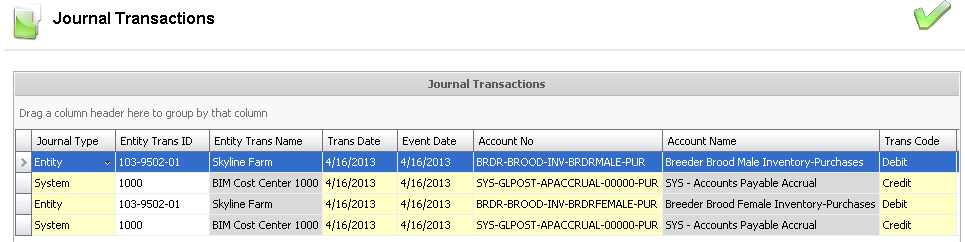
Journal Transaction
The posting process creates the journal
transaction. When the receiving transaction is posted, the journal transaction
is created to debit the delivery to the farm or entity and credit the
accrued payable transaction. When the purchase invoice is posted, the
journal transaction will debit the accrued payable transaction and credit
the accounts payable.