![]()
Processing plants can be created as internal or external facilities. Plants are defined based on one cost center per plant. Address information is entered as well as latitude and longitude details for mapping. The child grids for each plant contain details related to processing line speeds, weight and down time. If the plant is a third party or external plant, a Ship To Customer must be assigned to the plant.
Table Names: ProteinFacilityPlants, ProteinFacilityPlantLines, ProteinFacilityPlantLineDetail, ProteinaFacilityPlantDownTime
Prior to creating a plants, , the following item must be created:
The Plants screen is divided into the following sections:
In Admin>Business>General>Definitions>Facilities, select Plants.
Select  to
create a new plant.
to
create a new plant.
Plants contains the basic information pertaining to the plant with chid grids to enter data pertaining to the processing/production lines.
Enter a unique Plant No to identify the processing plant (alphanumeric, max 20 characters).
Enter a Plant Name to describe the plant (alphanumeric, max 50 characters).
Select a Cost Center No for the plant. Cost Centers can only be used for one facility.
Cost Center Name will populated based on the Cost Center No.
Suite ID defaults in and identifies the suite the plant is associated with.
Select a Facility Type from the drop-down list. Options are Company Owned or Third Party (External). Third Party facilities must have a vendor assigned to be used for purchases.
Select the Color that will be used for the facility for planning purposes in BRPA.
Select Customer No that will receive product from plant (select all that apply). Must be setup on General> Master Data> Customers.
In the Address 1-4 fields, enter the address details for the plant (alphanumeric, max 30 characters for each field).
Select the City where the plant is located. Cities are created in: Admin>Business>General>Definitions>Cities.
Select the State where the plant is located. States are created in Admin>Business>General>Definitions>States.
Select the County where the plant is located. Counties are created in: Admin>Business>General>Definitions>Counties.
Enter the Zip or postal code for the plant.
Enter the Yard Capacity or number of trucks allowed at one time. Parameter is used in LHS graph.
Enter the First Truck Arrival Time time the trucks begin arriving at the plant. Parameter is used in LHS graph.
Enter the Last Truck Arrival Time time truck stop arriving at the plan. Is not used in LHS graph. Optional
Enter the Latitude value for the plant. Used in Maps to show location of plant. (optional)
Enter the Longitude value for the plant. Used in Maps to show location of plant. (optional)
Enter Distance per Driver the average distance of all farms that supply product to the plant. (optional)

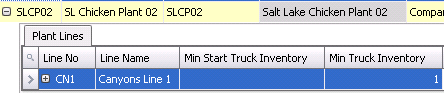
Plant Lines contains information regarding the processing/production line inventories with a child grids to enter data for capacities and operations.
Click
the child grid  in the Plant
No field to access the Plant Lines.
in the Plant
No field to access the Plant Lines.
Select
to create a new plant line.
Enter a Line No to identify the processing line (alphanumeric, max 20 characters).
Enter a Line Name to describe the processing line (alphanumeric, max 50 characters).
Enter a Start Truck Inventory number of trucks allowed in yard to start the processing.
Enter a Start Min Head Inventory the minimum number of birds to begin processing for the day.
Enter the Start Max Head Inventory the maximum number of birds to begin processing for the day.
Enter the Min Truck Inventory the minimum number of trucks that will contain product to be processed for the day.
Plant Line Details contain information pertaining the operation of line.
Click
the child grid in the Line
No field to access the Plant Line Detail.
Select
to create a new plant line detail.
Select a Product No from the drop-down list. Must be set up in General> Products> Animals> Poultry or General> Products> Animals> Swine.
Enter a sequential Process Order of how the product is to be processed.
Enter a Min Wt birds must reach before they are allowed to be processed.
Enter a Max Wt birds cannot go over in order to be processed.
Enter a Birds Per Hour an average number of birds per hour that can be processed.
Enter the Min Birds Per Hour that can be processed.
Enter the Start Time birds can begin being processed. (Optional)
Enter the Hours of Operation the line will be in operation. (Optional)
Enter the End Time birds stop being processed. (Optional)
Enter Sunday - Saturday Start Time the time the line begins processing. (Optional)
Enter Sunday - Saturday Hours of Operation the line will be in operation. (Optional)
Enter Sunday - Saturday End Time birds stop being processed. (Options)

Down Times contain information pertaining to when the lines will be shut down.
to create a new down time
line.
