MRP Profiles

The MRP Profile sets the parameters for the data that will be included
in the planning process. Multiple profiles can be created as required
depending on the business processes utilized by the Company. For example,
a Company may have separate profiles for the feed mill and live production
operations.
Create New Profile
- From the Profile index, click

- Click on General grid

General
- Enter the Profile
No for the profile. Alphanumeric, 20 characters.
- Enter the Profile
Name. Alphanumeric, 40 characters.
- Begin Date
defines the start date for the profile, therefore transactions prior
to this date will be excluded.
- End Date
defines the end date for the profile where transactions after this
date will not be included.
- The Active
flag defaults as selected indicating that the profile is available
to be used.
Import
The Import grid defines the sources that will be used to generate the
data for the profile.
- Purchase Orders
- imports purchase order quantity for purchase orders that have a
begin receive date within the date range of the profile. It only
includes the quantities that have not been allocated to Planned Receivings
or received in the date range of the profile.
- Planned Receivings
- imports planned receiving transactions with a receive date within
the date range defined on the profile.
- Purchase Orders
Beginning Inventory - imports the purchase order inventory
for those purchase orders that have a begin receive date prior to
the Begin Date defined on the profile.
- Product Beginning
Inventory - imports the beginning product inventory based on
the Begin Date defined in the profile.
Calculations
- Select the required Calendar
Type.
- Custom
- user defined set of date ranges
- Fiscal
- based on the Fiscal Calendar defined in MTech
- Gregorian
- based on calendar dates such as Jan 1-Jan 31, Feb 1-Feb 28,
Mar 1-Mar 31, etc.
- Select Include
Freight Costs if the cost of freight assigned to purchase orders
is to be included in the calculated average cost for the period.
- Select Include
Add On Costs if the add-ons included on purchase orders is
to be included in the calculated average cost for the period.
- Forward Balance
Expression allows the user to define the calculation to define
the balance to move forward to the next period. If there is no expression
defined, the system will roll the ending inventory balance forward
to the next period.
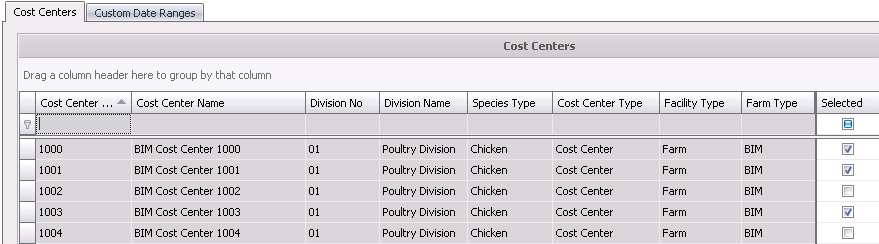
Cost Centers
Cost Centers must be selected to generate the data for the profile.
If there are no cost centers selected, then the profile will not generate
any data.
- Select the cost centers that are required for
the profile.
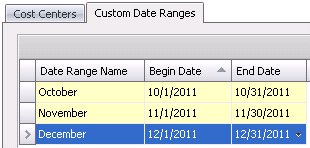
Custom Date Ranges
Custom Date Ranges are required to be completed if the Custom option
is selected for Calendar Type.
- Click to add a new date range.
- Enter a Date
Range Name to identify the range.
- Select the Begin
Date for the date range.
- Select the End
Date for the date range.