![]()
Product Groups allow the placement product to be different than the processing product. Targets are established based on the group. For example, the placement product may be BSR (Broiler Straight Run), however it may be processed as LSR (Large Straight Run) and SSR (Small Straight Run). The Product Groups are created in General>General> Products>Animal>Poultry by creating a new product. After the Group Product has been created, Internal Mappings tab is completed with the Products that can source the Group Product.
The following options are outlined in the Product Groups document:
Prior to creating a BRPA Product Group, the product must be created in General>General> Products>Animal>Poultry.
 to add
a new product
 to
add a new line to the Internal Mapping grid
to
add a new line to the Internal Mapping gridOnce the product has been created for the product group, the Product Group can be created in BRPA. The Products Group screen is comprised of four sections:
In the Products
Group main index, click  to
create a new record.
In the Production Performance dialog box, select the Product No and then click 'OK'.
 a
a
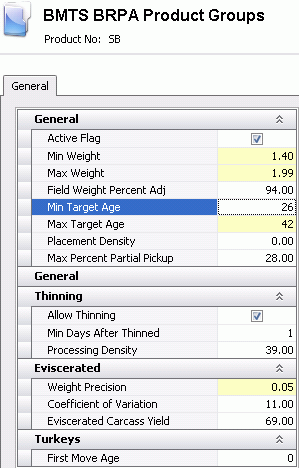
The General tab is used to enter the basic details for the product profile.
The Active Flag will default as selected to indicate that the product group is active. If the Product Group is no longer required, un-check the option.
In the Min Weight field, enter a minimum processing weight for the product group. This value is entered in lbs or kgs depending on the unit of measure.
In the Max Weight field, enter a minimum processing weight for the product group. This value is entered in lbs or kgs depending on the unit of measure.
Enter a Field Weight Percent Adj to represent the adjustment factor for the field weight. The field weight will be multiplied by the factor to get the processing weight.
In the Min Target Age field, enter the age, in days, that is the minimum acceptable for processing.
In the Max Target Age field, enter the age, in days, that is the maximum acceptable for processing.
Placement Density is entered when Registry>Plant>BRPA>General>Head Capacity Mode = Density. The user entered value will calculate the head capacity during placement schedule calculation if the seasonal density is not populated in BRPA Products>Seasonal Factors. This field is entered as ft2 or m2 required for each bird placed.
In the Max Percent Partial Pickup field, enter the maximum acceptable percentage of the entity that is allowed for a partial pickup.
Save and Close the record.