Purchase order invoices are used to invoice for products that have been received against a purchase order. The receiving transaction must be in 'Posted' status to be invoiced. Details are based on the received quantities, and can be for a single receipt, multiple receipts on a single invoice, or a single receipt with multiple invoices. Multiple purchase orders can be processed on one invoice. This document outlines the steps to create a purchase order invoice.
The following options are outlined in the Purchase Order Invoice:
In General>Purchases>Invoices,
click  to create a PO
Invoice as it is the default invoice type. Optionally, the
user can select the drop-down menu on the and
select PO Invoice.
to create a PO
Invoice as it is the default invoice type. Optionally, the
user can select the drop-down menu on the and
select PO Invoice.
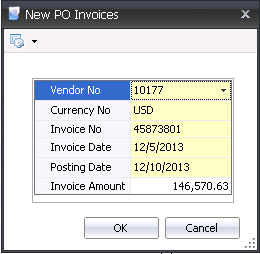
In the New
PO Invoices box, enter the details related to the vendor invoice
and select 'OK' to create the invoice.
The purchase invoice header contains the base data for the invoice, such as vendor, invoice number and invoice date. The purchase invoice header is divided into three sections within the header grid.
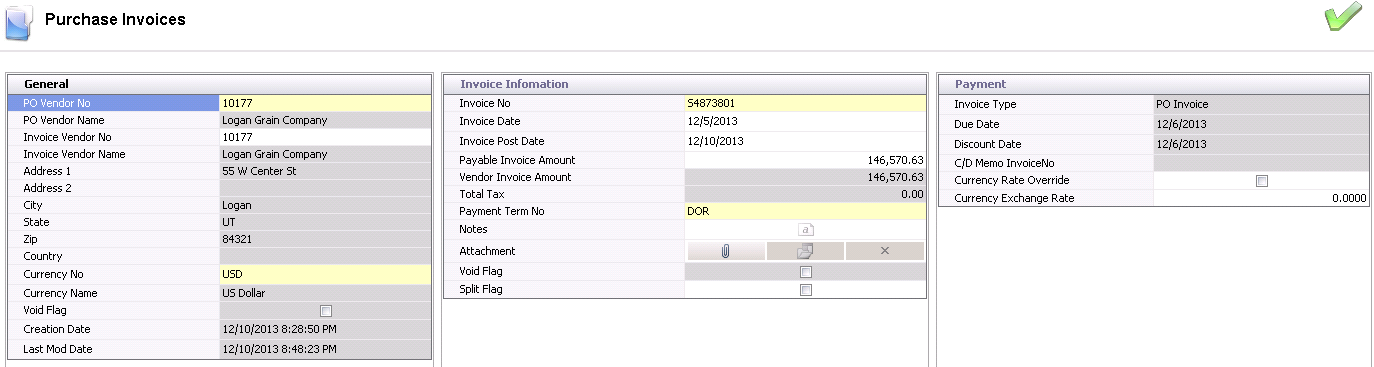
PO Vendor No defaults from the new invoice prompt and displays the code for the selected vendor.
PO Vendor Name displays the name of the selected vendor.
Invoice Vendor No can be selected if the PO Vendor No is a non-receiving vendor. The list of available vendors will be filtered based on the vendors defined on the Business Usages tab of the non-receiving vendor. Complete details are outlined in Non-Receiving Vendor Logic. If the PO Vendor No is not a non-receiving vendor, the Invoice Vendor No will default from the PO Vendor No with no option to edit.
Invoice Vendor Name will default based on the selected Invoice Vendor No.
City displays the name of the city in which the selected vendor is located.
State displays the name of the state in which the selected vendor is located.
Zip displays the zip code of the selected vendor.
Country displays the name of the country in which the selected vendor is located.
Currency No defaults based on the currency assigned to the invoice as defined in the new invoice dialogue. This will filter only invoices for the vendor for the selected currency.
Invoice No defaults from the new invoice prompt and indicates the document number from the vendor invoice.
Invoice Date defaults from the new invoice prompt and indicates the date of the vendor invoice. Depending on the payment term basis, this field may be used to calculate Due Date and Discount Date.
Invoice Post Date is a reference field that represents the date the details will be posted in the financial system.
Payable Invoice Amount indicates the amount that will be paid to the vendor. The Invoice amount must equal the total of the detail lines for the invoice to be paid. The Invoice amount must equal the total of the detail lines for the invoice to be paid unless there is a tolerance amount established in Registry>Payable Invoice Tolerance Amount. This tolerance is usually a very small amount in the event of rounding errors between the vendor and the transaction. The variance incurred will be coded to a system variance account SYS-GLPOST-VARIANCE-00000-PUR.
Vendor Invoice Amount displays the amount that the vendor has deemed payable. This amount transfers from the new invoice prompt and cannot be modified. This field is only for information purposes to indicate if there is a difference between what the vendor invoice indicates versus the amount that the vendor will be paid.
Total Tax indicates the total amount of tax applied to the transaction. This amount cannot be modified. Tax details can be viewed on the child grid.
Payment Term No defaults from the selected vendor. Payment terms can be modified if required. The payment terms will be updated when the line details are entered if the purchase order terms are different than the vendor terms.
In the Notes field, enter any additional comments related to the vendor invoice.
Selecting the Void Flag will nullify the purchase invoice.
Split Flag is used if there are multiple invoices for one shipment. If the entire received quantity is not invoiced in a single invoice from the vendor, the Split Flag will be selected if the received quantity is modified on the line detail selection dialog.
The Payment tab is a read-only tab and cannot be modified. The fields will automatically generate from the information provided in the first two tabs - General and Invoice Information - and cannot be modified.
Invoice Type displays the type of invoice, and will default to PO Invoice.
Due Date determines when the payment must be received by. This is a calculated field based on the selected payment terms and term days defined on the payment term. There is no logic in the system to calculate and record the discount amount.
Discount Date is a calculated field based on the selected payment terms and discount days defined on the payment term.
C/D Memo Invoice No is only populated for Credit and Debit Memo invoice types and references the source invoice that the credit or debit memo was created from.
Select the Currency Rate Override flag to override the current currency rate.
Enter
the Currency Exchange Rate.
The Details grid contains two tabs:
.
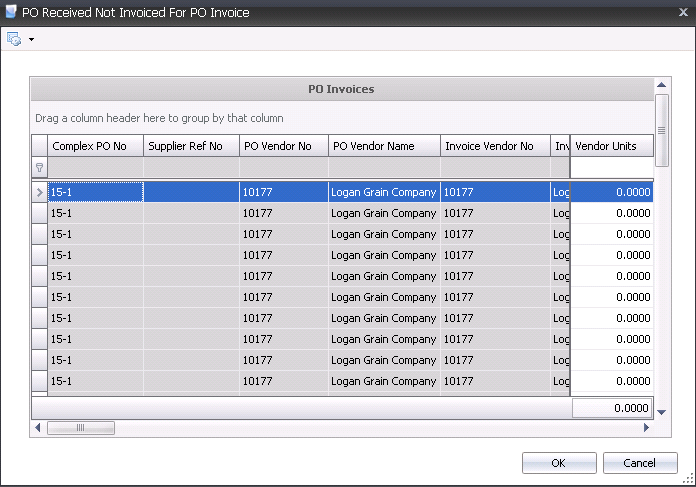

PO Line Item is assigned by default and indicates the purchase order for the selected receiving line.
Entity No is an optional field to identify the entity that received the order.
Record Type indicates the location type.
Vendor SKU No represents the vendor sku that was received. Select the vendor number from the drop-down menu.
Invoice Discounts indicates the total amount of discounts defined on the purchase order and calculated based on the receiving transaction. Add-on details can be viewed and modified on the Discounts Add-Ons tab of the child grid.
Invoice Taxes indicates the total amount of applicable taxes as defined on the purchase order and calculated based on the receiving transaction.
Invoice Bonus is the amount related to assays on the receiving transaction if applicable and increases the amount payable to the vendor. Currently, this option will only be calculated for ingredient receivings.
Invoice Penalty is the amount deducted from the vendor related to assays on the receiving transaction if applicable and decreases the amount payable to the vendor. Currently, this option will only be calculated for ingredient receivings.
Invoice Total Amount indicates the total amount payable to the vendor for the receiving line.
Received Quantity represents the quantity actual received derived from the receiving transaction. This may be different than the Invoice Quantity is the user modified the user quantity or if the total amount is not being invoiced on one invoice.
Received Unit Price indicates the actual per unit price as derived from the receiving transaction. This may be different than the Invoice Unit Price if the Invoice Amount was changed for the invoice line.
Received Amount is the amount calculated on the receiving transaction based on the received quantity and the purchase order price. This may be different than the Invoice Amount if the user modified based on the Price Mode.
Received Premiums Total is the total amount of premiums as calculated on the receiving transaction based on the received quantity and the purchase order details.

Received Discount Total is the total amount of discounts as calculated on the receiving transaction based on the received quantity and the purchase order details.
Received Bonus is the total amount of the assay bonus amount as calculated on the receiving transaction based on the received quantity and the purchase order details.
Received Penalty is the total amount of the assay penalty amount as calculated on the receiving transaction based on the received quantity and the purchase order details.
Received Total is the calculated total amount of the receiving transaction including product, add-ons, penalty/bonus and taxes.
Received Tax Total indicates the total amount of applicable taxes as defined on the purchase order and calculated based on the receiving transaction based on the rate that is in effect on the received date.
Price Variance indicates the difference between the Total Invoice Amount and the Total Received Amount. If the Price Variance is equal to 0, the invoice is automatically Approved. Otherwise, there is a threshold switch in setup to determine if the variance is within the acceptable tolerance. If the tolerance factor is set to 0%, all variances must be manually approved. This tolerance is established in Registry>Product Types>PO Invoice Percent Approval Threshold.
Currency Effective Date is used for multi-currency transactions. The field will define the date for the rate that is applicable to the purchase invoice.
Currency Exchange Rate automatically sets to the current exchange rate based on the rate that is in effect on the invoice date. If the currency rate needs to be modified, the user can select the Override Currency Option in the invoice header and enter the applicable invoice currency rate, This will override the default that has been set based on the Exchange Rates table. If the rate is different than the exchange rate incurred at receiving, the difference in the converted amount payable will be coded to the foreign exchange gain/loss account.
Final Invoice is used for split payments where there are multiple payments for a single receipt. When the final quantity is allocated to a vendor invoice, the Final Invoice flag is marked. This will force the system to clear out the remaining amount in the accrued payables account.
Approved
Date represents the date that the transaction was approved.
Within the PO Line Item tab, there is a child grid with additional tabs
that can be created. The details in the child grid will default from the
vendor sku with the option to modify. Click ![]() to
display the child grid for the PO Line
Item.
to
display the child grid for the PO Line
Item.
The add-ons default from the receiving transaction based on the received quantity and the add-on details defined on the purchase order. Depending on the Price Mode, the amounts may or may not be modified. It is important to note the different type of add-ons and those that will transfer to the invoice based on the Payment Type. The following guidelines are the same regardless of whether the add-on is a premium or discount.
| Payment Type | Receiving Transaction |
Purchase Invoice |
| Transaction | Always |
Yes, if Payee Type = not set |
| Rebate | Always |
Never |
| Internal | Always |
Never |

Transaction Basis is a read-only field that defaults from the receiving transaction as defined on the purchase order.
Payment Type determines when the add-on payment is made. The Payment Type on the invoice will only be Transaction as the other modes do not transfer to the purchase invoice.
The Payee Type will always be 'Not Set' as those are the only transaction types that default to the purchase invoice.
Transaction Entity ID will always be blank as those are the only transaction types that default to the purchase invoice.
Tax amounts will default from the receiving transaction based on the rate that is in effect at receiving. If the tax codes are missed on the purchase order or the tax amount is incorrect, there is a tax override option to adjust the amounts. The Tax Override flag must be selected for the taxes to be modified.
Tax No identifies the tax code to be applied to the product and add-ons for the selected line item. The Taxable flag must be selected in the product and add-ons for taxes to calculate.
Tax Name describes the selected tax code.
Amount will display the total amount of taxes on the product. If the Amount needs to be modified, select the Tax Override flag and enter the required amount.
The Receiving screen displays the receiving transactions entered for the purchase invoice. The view is read-only for information purposes only.

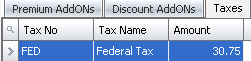
The Taxes tab displays the total taxes
calculated for the invoice based on the taxes calculated for the product
and add-ons. This tab is derived data and therefore, read-only.

Tax No identifies the tax code for the taxes that were calculated.
Tax Name describes the selected tax code.
Amount will display the calculated amount of the tax based on the tax calculated on the receiving transactions on the invoice. If the amount is incorrect, the Tax Override option must be selected in the invoice line item and taxes for each line modified accordingly.
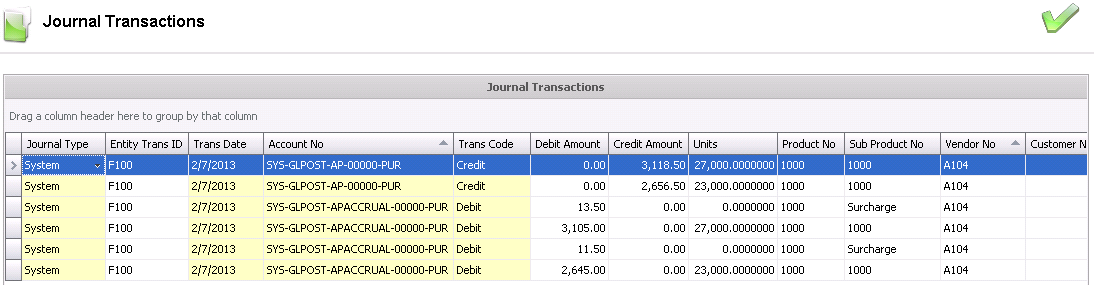
Once the Purchase Order Invoice has been created and saved, the invoice needs to be posted. The posting process locks the purchase invoice to prevent edits, and creates the journal transaction to record the liability. The UnPost option unlocks the invoice and reverses the journal transactions.
In order for the invoice to be posted, it needs to be in Approved status. The invoice will automatically default to Approved status if the invoice amount matches the received amount exactly or within the defined tolerances.
 button in the menu bar.
The posting process creates the journal transaction. The journal will reverse the accounts payable accrual that was incurred when the product was received and record the payable amount to the vendor.
| DEBIT | Accounts Payable Accrual |
| CREDIT | Accounts Payable |