Add-On invoices are created for rebate type transactions. The Add-On invoice is used to process payment to vendors for add-ons that have been processed in receiving transactions. For example, the product is payable to Vendor A, but the add-on is payable to Vendor B. There is the option to create either a Premium Add-On invoice or a Discount Add-On invoice. The steps outlined in this document will detail how to create a Premium Add-On Invoice, but the process is the same for both Premium and Discount with the exception:
The following options are outlined in the Add-On Invoice:
In General>Purchases>Invoices,
select the drop-down menu on the  and select Add-On Invoice
Select Premium AddOn Invoice or Discount AddOn Invoice.
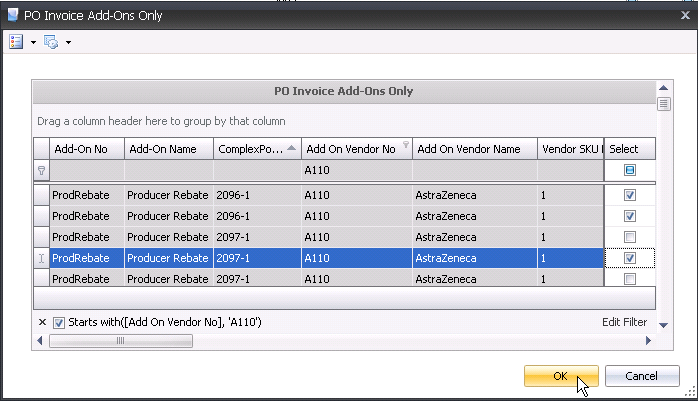
In the PO
Invoice Add-Ons Only box, filter the selection grid for the
Add On Vendor No tab and select the required transactions. Click 'OK'
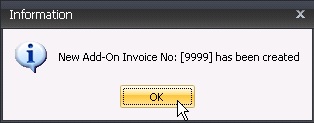
to create the invoice.
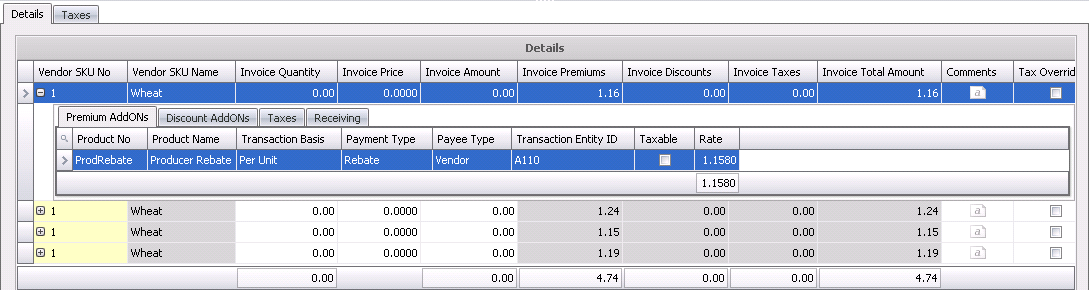
The purchase invoice header contains the base data for the invoice, such as vendor, invoice number and invoice date. The purchase invoice header is divided into four sections within the header grid. The majority of the details related to the header are as outlined in Purchase Order Invoice.
The Payable Invoice Amount will automatically calculate based on the selected add-ons for the invoice. This amount must balance to the Total Invoice Amount for the invoice to post. There is an option in registry to establish the Payable Invoice Tolerance Amount, however this is generally not required as the Payable Invoice Amount is automatically calculated.
The Invoice Type will be automatically set to Debit Add On or Credit Add On.
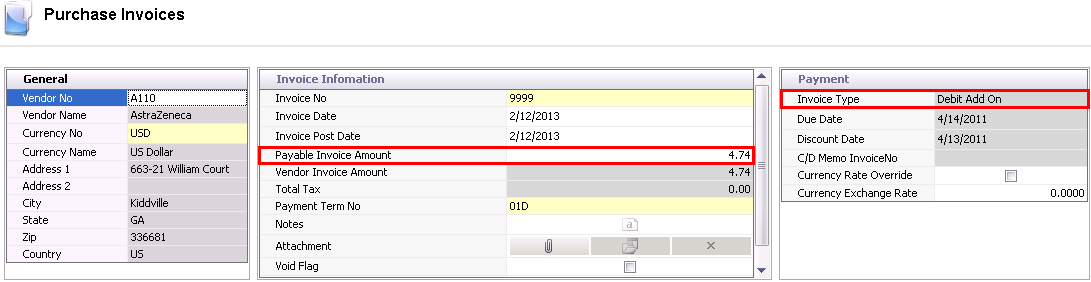
The line details are automatically added based on the items selected in the new add-on invoice prompt.
Once the Add-On Purchase Invoice has been created and saved, the invoice needs to be posted. The posting process locks the purchase invoice to prevent edits, and creates the journal transaction to record the liability. The UnPost option unlocks the invoice and reverses the journal transaction.
In order for the invoice to be posted, it needs to be in Approved status. The invoice will automatically default to Approved status if the invoice amount matches the received amount exactly or within the defined tolerances.
 in the invoice menu.
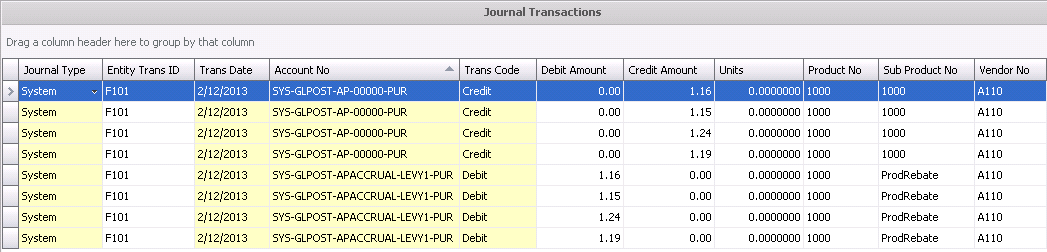
The posting process creates the journal transaction. The journal will
reverse the accounts payable accrual that was incurred when the product
was received and record the payable amount to the vendor.
PREMIUM ADD-ON INVOICE |
DISCOUNT ADD-ON INVOICE |
| Debit - Accounts Payable Accrual | Debit - Accounts Payable |
| Credit - Accounts Payable | Credit - Accounts Payable Accrual |