Freight products are created, and then the option is available in the purchasing process to assign the freight to the products. Freight can be included in the inventory cost of the product or optionally expensed to a separate freight account.
Prior to creating a Freight Product, the following items should be created.
The following features are outlined in this document:
The Freight Products screen has several tabs that must be completed in the creation process.
The General tab contains the base data for the product.
In General>General>Products>, select Freight.
In
the Freight Products index,
click  to create a new freight product.
Click on the General tab.
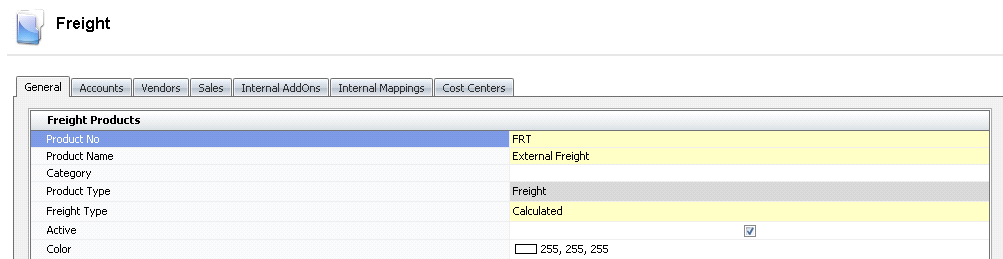
Enter the Product No to identify the product within the system (alphanumeric, max 50 characters).
Enter the Product Name as a description for the product (alphanumeric, max 100 characters).
Category is an optional field where the product an be assigned to a category. The categories must be pre-defined before being assigned to the product, in Admin>Business>General>Definitions>Product Categories.
Freight Type defines how the freight is calculated. Options are:
Calculated: Amount is calculated based on a unit of measure (Example: Rate per ton).
Distance: Amount is calculated based on a rate per mile or km. Currently, this option is only available for internal freight charges when the distance is defined on the farms.
Load: Amount is calculated and allocated on a per load basis.
Order: amount is calculated and allocated on a per order basis
The Active flag will default as selected. If the product is no longer utilized, the active flag is required to be unchecked.
Products can be Color coded for easy view for planning purposes. If desired, choose the color from the color grid.
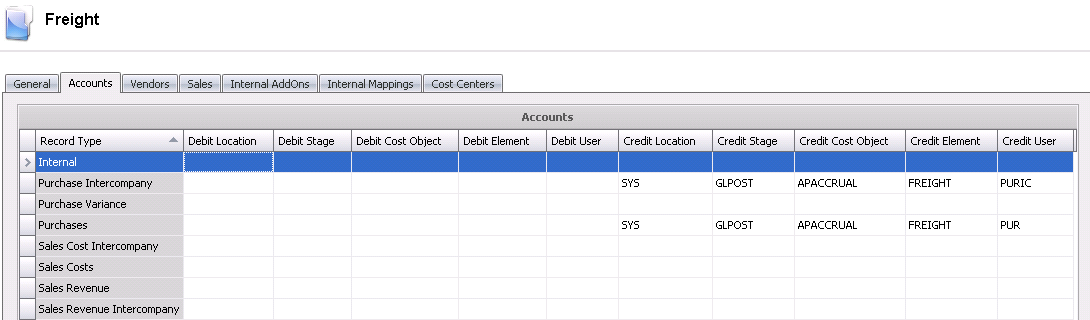
The Accounts tab defines the account segments that will be used in each journal process throughout the system. The Account tab for freight defaults with all segments being blank, which means that the freight charges will assume all of the products of the account that it is assigned to in the purchase order. If the freight order is required to go to different accounts, then this needs to be specified on the accounts screen. Alternatively, freight accounts can be added if required. If an account is added, the new account must be created within the Chart of Accounts for the transactions to be processed.
Before freight can be used in the purchasing process, the vendor/product relationship must be established. A vendor sku must be created for every vendor that charges the defined type of freight. A vendor must have the Transport Vendor flag checked before it can be used as a freight vendor. This option allows the user to define the unit of measure and any additional costs or discounts associated with the freight.
.
Vendor No contains a list of previously defined vendors. Select the vendor where the freight is purchased from.
Vendor Name displays the name of the selected vendor.
In the Vendor
SKU No field, enter the code that is used when ordering the
freight from the vendor (alphanumeric, max 50 characters).
* This is optional and can be the same as the product code; however
the vendor SKU must be unique to the vendor.
In the Vendor SKU Name field, enter a description of the freight that is being purchased. The field will be displayed on purchase orders (alphanumeric, max 100 characters).
In the Unit Description No field, select the required unit of measure in which the freight will be purchased. The Unit Description No must be predefined in Admin>Business>General>Definitions>Units of Measure prior to being selected on the Vendors tab. This field is generally only used for calculated freight types where the amount is calculated on a per unit rate.
The Unit Description Name will default based on the selected Unit Description No.
Inventory Units indicates the number of units that will be added to inventory when the vendor unit is received. Distance, Load and Order freight products will all have inventory units of 1.00. Calculated freight must have the units defined. For example, if the freight product is calculated on a per ton basis, the user would enter "1000" for metric ton or "2000" for imperial ton. This will calculate the proper freight rate based on the product units received.
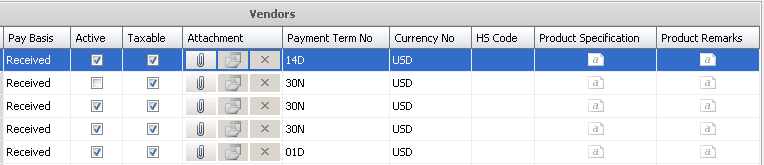
Pay Basis determines if the vendor is paid based on received units or shipped units. The default is set to Received, but it can be modified..
The system will default the vendor SKU as Active. If the product is no longer purchased from the vendor, de-select the option.
If the product is Taxable, the flag must be checked to calculate taxes on the product. The tax code can be optionally added to the Vendor SKU, but must be added to the purchase order for taxes to be calculated.
In the Attachment section, any type of file can be attached (Example: Word document, picture, music or video clip).
Payment Term No displays the payment terms and defaults from the vendor, with an option to select by product.
Currency No defaults from the vendor and displays the code for the currency, with an option to modify by product.
HS Code represents Harmonized System Code, which is used for international shipments. Enter the code based on the international defined code.
Product Specification is a text field to enter details related to the product vendor SKU.
Product Remarks is a text field to enter any other details specific to the vendor sku.
In the child grid within the Vendor No, there is the option to define the add-ons related to the product. The add-ons must be pre-defined in General>Products>AddOns prior to adding to the vendor sku. Depending on how the add-ons are configured, the cost of the add-on can be included or excluded from inventory cost of the product. The add-ons can be configured to be included in the cost of the product or alternatively, be coded to an entirely different account which is not included in the product cost.
There are two types of add-ons:
Premium add-ons add to the cost of the product.
Discount add-ons reduce the cost of the product.
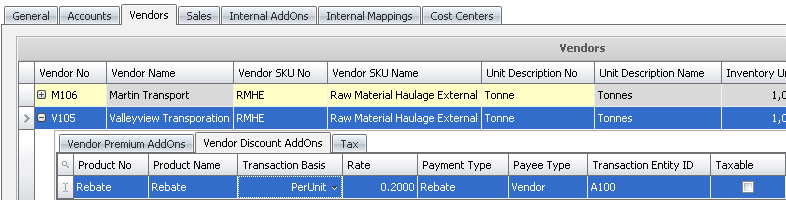
In the Product No field, select from a list of previously defined add-ons codes. The add-ons will transfer to purchase orders created for the vendor SKU. Add-ons can be found in: General>Products>AddOns
Product Name is a read-only field that displays the description of the add-on product type.
Transaction Basis is a read-only field that defaults from the selected add-on and determines how the add-on is calculated. Options are: Per Unit, Percentage, Flat Rate, or Free Percentage. Free percentage is only used for poultry products
Payment Type determines when the add-on payment is made. Options available are:
Transaction: Processed at time of receiving and will be included in the vendor payment.
Rebate: Will record accrual amount at time of receiving but will not transfer to the invoice. Payment/invoice will be processed at a later date.
Internal: An internal transaction that is not invoiced to an external source (Example: There is a haulage department that gets a credit for hauling products).
The Payee Type field is optional. If the add-on is to be processed by an alternative source, select the source type for the add-on. Options are: Customer, Vendor, Employee, or Cost Center. If the field is left blank, it assumes the vendor sku for the payment of the add-ons.
Transaction Entity ID is a required field if a different Payee Type is selected. Select the appropriate vendor or cost center.
Rate is an optional field to enter a default rate for the add-on. The rate will default to contracts and purchase orders for the vendor, and can be modified as required.
Taxable identifies if the item is taxable or non-taxable when the item is purchased. Tax codes must be assigned to the sales order for the taxes to be calculated.
If the freight and/or add-ons are taxable, the tax codes can optionally be defined at the vendor sku. It is recommended that the tax codes are only entered on the vendor sku if that vendor only delivers within the same state or province, as different tax rate can be applied depending on the destination. Tax codes must be previously defined. Rates will default to the purchase order based on the rate that is in effect on the purchase order date.
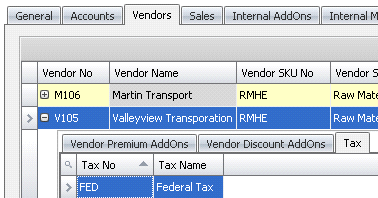
Tax No is selected from the predefined in Admin>Business>General>Definitions>Tax Codes. The tax code will default to purchase contracts and purchase orders for the vendor sku.
Tax Name defaults from the selected Tax No.
There are three options available for freight products:
The Reset Default Accounts sets the Product>Accounts tab back to the system defined default accounts. This process can be initiated from the index list or directly within the product.
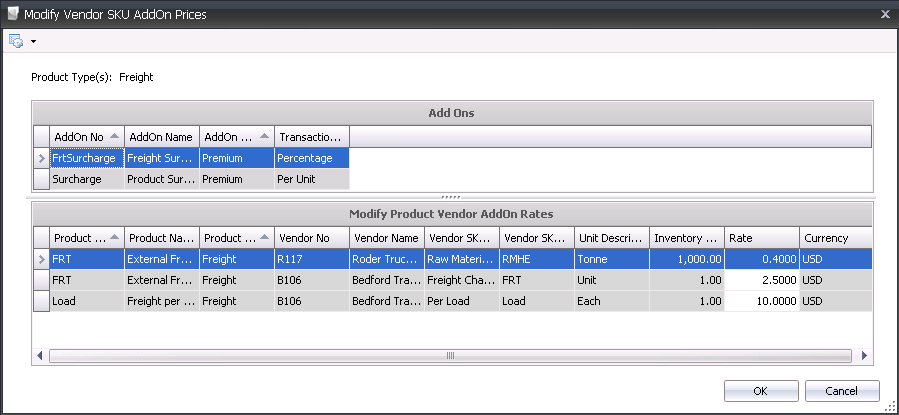
The Modify Vendor SKU Add-on Prices option allows the user to modify the add-on prices from a single data entry screen rather than having to access each product to modify the prices. The feature can be initiated from the product type index to only change add-ons for that specific product type or from General>Products>Master to change the add-on prices for all product types in one screen.
The Auto Refresh option is selected by default. This option updates the index immediately when changes are made to the products. If the auto refresh option is not required, de-select the option and the index must be manually refreshed by the user.