machine transfers

Machine Transfers move the eggs from the setter to the hatcher. There
are two options available for transfer. They system can always transfer
the eggs on the specified number of days or, alternatively, the registry
can be set so there is flexibility to transfer the eggs on a different
number of days. Transfers are typically done at 18 days.
An Eggs Set Record must be created
before creating a Machine Transfer transaction.
The following procedures are outlined in the Machine Transfers document:
Create
a Machine Transfer
Machine Transfers
The Machine Transfers section contains the details relating to the transfer
of the eggs.
- In BMTS>HIM>Transactions>Eggs>Hatcher,
select Machine Transfers.
- In the Machine
Transfers main index, click
 to add a new
transfer transaction.
to add a new
transfer transaction.
- In the New Record dialog box, from Hatchery
No, select the required hatchery.
- In the Trans
Date field, enter the date
that the transfer will take place. The transfer date can be found
in the header section of the Eggs
Set transaction. Click 'OK'.
- If the Setter Transfer Mode switch is set to 'Auto',
the details will automatically default into the Machine Transfers
screen. If the switch is set to 'Manual', click in
the Machine Transfers screen to add a new disposal line.
- The Egg Set Inventory box will display all current
inventory for the selected hatchery.
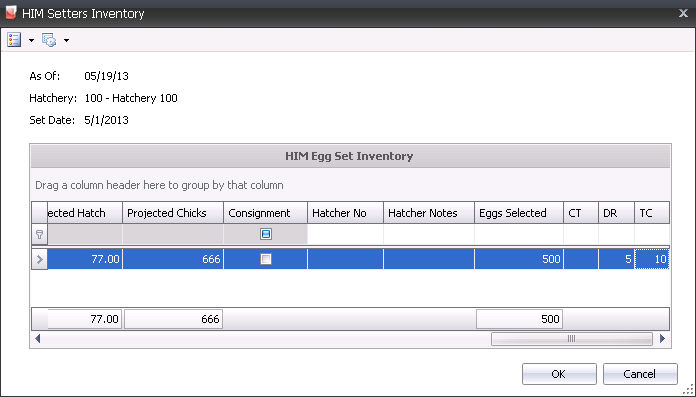
- Select the required entity and, from the Hatcher No drop-down menu,
select the hatchery where the eggs are located. The Hatcher
Notes field can be used to enter additional information about
the hatcher.
- In the Eggs Selected
field, enter the number of egg units to be transferred.
- The additional fields (in this case, CR, DR) are
reject categories, used to outline reasons for egg rejects. Enter
the correct numbers for each category, if applicable. Reject categories
must be set up prior to use in: Admin>Business>Poultry>HIM>Egg
Hatcher Reject Codes.
- Click 'OK' and the Egg Machine Transfers screen
will add the transfer line with fields populated.

- Trans Code
indicates the type of transaction, and will default to 'Receiving'
when a new egg machine transfer is created.
- Complex Entity
No indicates the entity number for the eggs that were transferred.
- Farm Name
will default in from Complex Entity No and displays the name of the
farm that produced the eggs.
- Breed No
is a derived field based on the selected entity, and is used to identify
the breed of the eggs.
- Breed Name
displays a description of the breed.
- Egg Product No indicates the
egg product that was received and is being transferred.
- Egg Product Name
displays the name of the egg product.
- Tracking No
displays the tracking number that the eggs were received on.
- Set Date
indicates the date that the eggs were set.
- Production Date
displays the date that the eggs were produced, to determine egg age.
- Received Date
displays the date the eggs were received at the hatchery.
- Hatch Date
displays the date the eggs are expected to hatch.
- Hatcher No
defaults in from the selection in the Egg Room Inventory dialog box,
and indicates where the eggs will be transferred to.
- Hatcher Name
displays the name of the hatcher.
- Setter No
indicates the setter in which the selected eggs were placed.
- Setter Name
displays the name of the setter.
- Buggy No
identifies the buggy used if the eggs were loaded directly onto a
buggy.
- Buggy Name
displays the name of the buggy used, if applicable.
Adjusted Eggs
Set displays the difference between the original eggs set and
any rejects or disposals.
Eggs Set
displays the number of eggs that were set for hatch.
Hatchable
Eggs Set displays the number of eggs set that are hatchable.

Hatcher Notes
displays any notes that were entered in the dialog box when selecting
the eggs.
Egg Age
is a derived field based on the received date less the production
date.
Flock Age
is a derived field based on the selected entity and the production
date.
WOL
displays the number of weeks in lay that the entity produced eggs.
Base Hatch
indicates the estimated hatch at the time the eggs were received.
If the entity had a standard table associated with the entity, the
base hatch will be established from the standard table based on the
age of the entity at receipt.
- Projected Hatch
adjusts the based hatch percent on the egg age if an egg age decline
table is used as well as recent hatch transactions. If the egg age
decline percentage is not defined on the breed code, the projected
hatch will equal the base hatch.
- Projected Chicks
is a calculated field for the estimated number of chicks, based on
the eggs received multiplied by the projected hatch.
Transaction
Time indicates the time the transaction took place.
In the Egg
Weight field, enter the weight per egg, or a single average
weight of all the eggs being transferred.
Total Rejected
Eggs displays the number of eggs that are being rejected.
- The Consignment
flag will be selected if the eggs were purchased using a Consignment
Purchase Order.
- The Notes
field can be used to enter additional information about the machine
transfer.
- Selecting the Void
Flag will cancel the transaction.
Rejects
The Rejects section contains the details relating to the eggs that are
being rejected. If the machine transfer is automatically created from
the set, the Hatchable Egg Set will not be adjusted. If the machine transfer
is manually created, the Hatchable Egg Set will be adjusted based on the
rejects where the Percent Hatchability is set to Include. Reject codes
must be set up prior to use in: Admin>Business>Poultry>HIM>Egg
Hatcher Reject Codes.
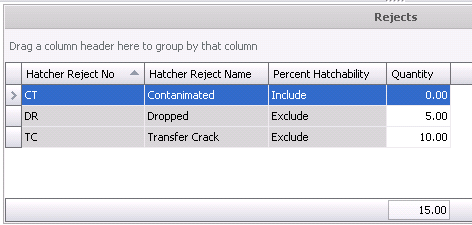
- Hatcher Reject
No identifies the reason for the rejection.
- Hatcher Reject
Name displays a description of the rejection.
- Percent Hatchability
is set when the reject code is defined. The user has the ability to
select include which will include the rejected eggs in the hatchability
calculation or, alternatively, exclude the rejected eggs from the
hatchability calculation.
- In the Quantity
field, enter the number of eggs rejected for each category.
Additional Options
There are two Options menus that contain additional options related
to the Machine Transfers transaction:
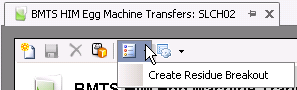
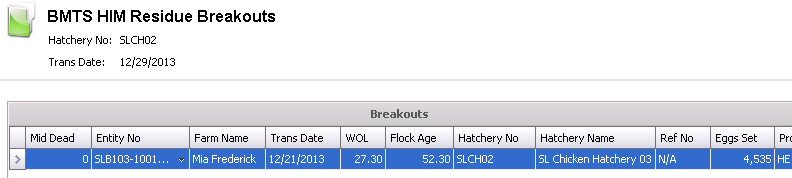
Create Residue Breakout
In the Eggs Set transaction screen, the Options menu can be used to
create a residue breakout transaction.
- In the Eggs Machine Transfers main screen, click
the Options
 button and
select Create Residue Breakout.
button and
select Create Residue Breakout.
- The Residue
Transaction dialog box will appear with all available entities.
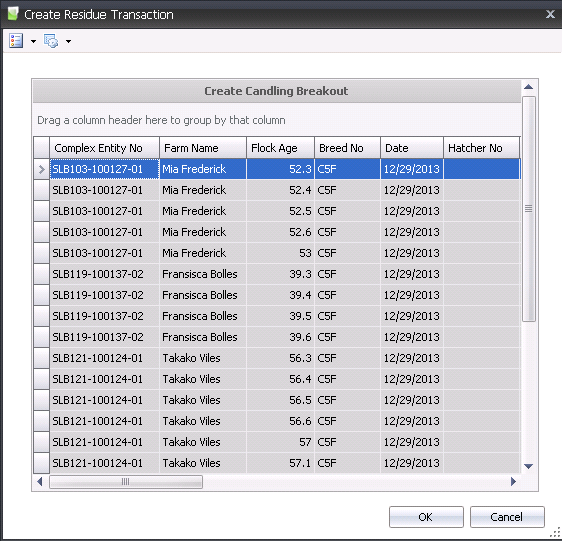
- Select the required entity line and click the
OK button. A Residue Breakout transaction will be created.
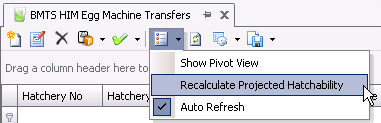
Recalculate Projected
Hatchability
- In the Eggs Set main menu, click the Options button and select Recalculate
Projected Hatchability.
- The Recalculate Base Hatchability dialog box will
appear.
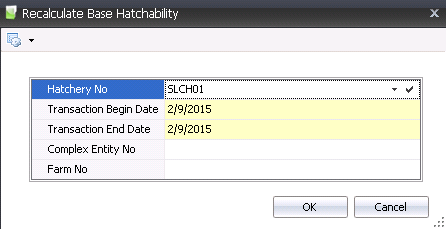
- From Hatchery
No, select the hatchery where the base hatchability will be
recalculated.
- Transaction Begin
Date is used to enter the beginning date for the transaction
date range to determine what records are to be calculated.
- Transaction End
Date is used to enter the ending date for the transaction date
range to determine what records are to be calculated.
- Complex Entity
No is an optional field that can be used to select the parent
flocks to be recalculated.
- Farm No
is an optional field to select the parent flock farms to be recalculated.
- Click the `OK` button and the hatchability will
be recalculated.
Post
a Machine Transfer
Once the machine transfer n is saved and closed, the transaction can
be posted. The posting process locks the transaction to prevent edits,
and will move the eggs from egg room inventory to setter inventory. Journals
will be created at period end.
- In the Machine Transfers main index, select the
required transaction, rick-click and select 'Post.' Alternatively,
click the green check mark
 in the top menu bar and select 'Post Record(s).'
- To un-post a machine transfer transaction, select
the required transaction and right-click to select 'UnPost'. This
process will set the transaction status to 'Reversed' status, which
allows the transaction to be edited.