hatching calendar

The Hatch Calendar determines the supply from the hatcheries that will
be available to be placed in the field. The calendar has a view that displays
the supply in daily, weekly or monthly views with options for customizing
the view to the user’s requirements.
Create a Hatching Calendar
The following components are outlined related to creating a Hatch Calendar:
- In BMTS>BRPA>Planning
, select Hatching Calendar.
In the Hatching
Calendar main index, click  to create
a new record.
In the Profiles dialog box, select the Profile No and then click 'OK'.
Details
- In the Hatch Calendar Details tab, click
 to create a new line.
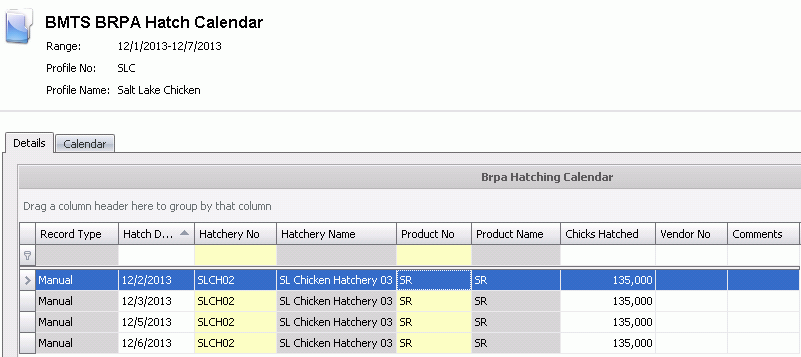
- Record Type
indicates the type of record being created and will default
to 'Manual' with no option to modify.
- Enter the Hatch
Date of the planned chicks hatched. This field will default
with today's date and can be modified as required.
- From the Hatchery
No drop-down menu, select the hatchery where the chicks
will be hatched.
- Hatchery Name
will default based on the Hatchery No.
- Product No
is a required field to enter the product that will be hatched on the
specified date. The product is the base product that is produced such
as SR. The projected processing schedule will then define the processing
product based on the product groups, for example, large bird vs small
bird.
- Product Name
will default based on the Product No.
- In the Chicks
Hatched field, enter the number of chicks that are to
be hatched on the specified date for the selected product.
- Vendor No
is used if the chicks are being sourced from an external supplier.
If applicable, select the vendor from where the chicks are being purchased.
- The Comments
field is used to enter any comments for the specified
hatch date.
- Save and Close the record.
Calendar
The targets can be viewed in the calendar once they have all been created.
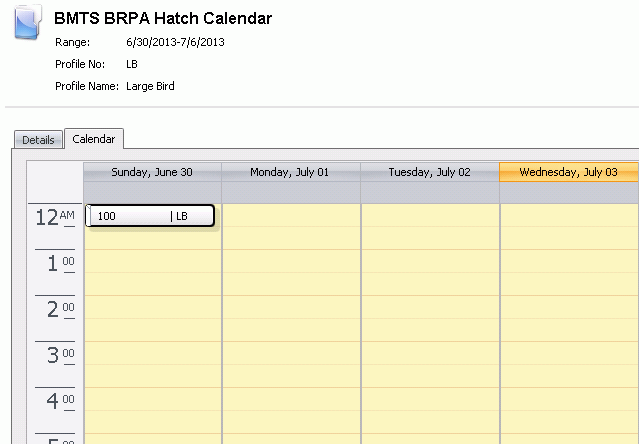
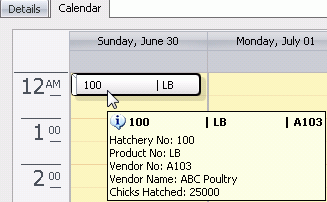
- By hovering over an Item, the basic information
can be viewed in a bubble.
- Items can also be relocated by dragging and dropping
the item to a new day or time.
By right-clicking on the item and selecting
'Copy', the item can be duplicated by using the 'Recurrence'
option.

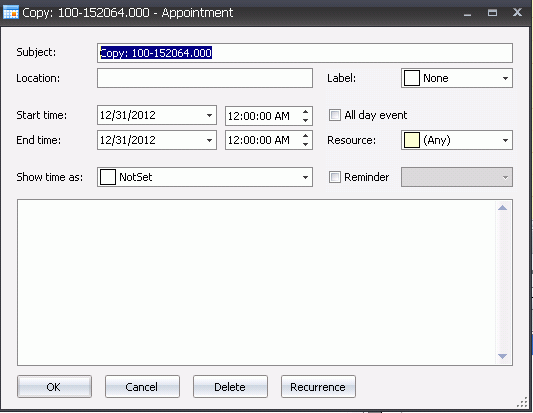
- In the Appointment dialog box, select 'Recurrence'.
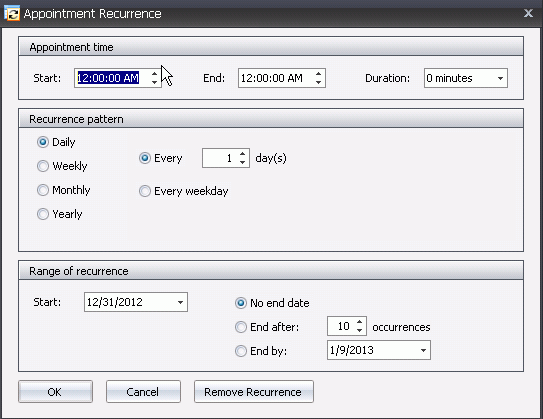
- In the Recurrence
Pattern selection, select how the entry is to reoccur. Available
options include: Daily, Weekly, Monthly or Yearly.
In the Range of Recurrence section, enter the
Start Date.
Select the End
Date. Available options are: No end date, End after (x
amount of occurrences), or the End by date.
Click 'OK' and then in the Appointment dialog
box, click 'OK' again.
Save and close the record.
*Note:
The hatches will be the same as the record used to create the occurrences.


 to create
a new record.
 to create a new line.


