
The Poultry Registry is used to set registry settings for poultry and related transactions. The registry contains the following tabs:
The System tab of the registry contains numerous components related to the system registry settings:


Cache memory Limit (Megabytes) is used to enter the amount of memory on the computer, in megabytes, that can be used by the cache. Setting it to zero means that it will be auto-sized.
Physical Memory Limit % is used to enter the percentage of physical memory that the cache can use. Setting it to zero means that it will be auto-sized.
Polling Interval is used to enter the maximum time that can occur before memory statistics are updated.
Sliding Expiration is used to enter a span of time within which a cache entry must be accessed before the cache entry is evicted from the cache.
Selecting the Allow system to define cache settings flag ignores the cache settings specified in the registry and uses optimum configuration settings.
In the System section, click the General child grid.

When the Allow Negative Requisition flag is selected, the logic will allow the warehouse to transfer more product than what is defined in the Requisition inventory and for farms, logic will allow the farm to receive more product than what is defined in the Requisition inventory.
If the Approval flag is selected, logic will enforced Purchase/Sales Orders to be approved.
Contract Number Mode indicates the contract numbering mode. Available options are:
Global Sequential - generated sequentially using a system counter.
Manual - user defined
Vendor Sequential - generated sequentially using a vendor specific counter.
Egg Regrade Screen Mode specifies the format of the dialog used to enter regrade transactions. Available options are:
Single Grid - displays the inventory and then a column for each category.
Split Grid - displays inventory in a top grid and the regrade categories in a bottom grid.
Farm Feed Inventory Mode will instruct the program on whether farm feed inventory can be negative or not. Available options are Allow Negative Inventory or Do Not Allow Negative Inventory.
Farm Feed Inventory Startup Date is used to specify a date to instruct the program to create feed inventory records for every transaction that adds or depletes feed inventories on farms.
Field Product Farm Level Usage Mode indicates whether farm usages will be created automatically when the Farm Receiving is posted.
Fiscal Calendar Months is used to enter the number of months in the fiscal year. The number entered is usually 12 or 13.
Inter-company Sales Mode is used to indicate how sales transactions are created with inter-company transactions. Available options are:
By Company - inter-company sales transactions are automatically created when a transaction goes between two companies.
No Inter-company - inter-company sales transactions are NOT automatically created when a transaction goes between two companies.
If the Internal Order flag is selected, internal orders will be generated when the placement is posted. Order shipments will be used to create placement transactions. If the flag is not selected, placement transactions will be created using HIM placement transactions.
Warehouse/Farm Product Cost Mode indicates how inventory valuations/cost tracking can be determined. Available options are Average Cost or First-In First-Out (FIFO).
Journal Transactions Unpost Mode determines how journals are processed when source transactions are reversed. Available options are Delete or Reverse.
Logging Mode indicates how logging records information about actions performed in the system by users. Operation log entries are removed after 180 days. Available options are: High Individual Records, Low Tasks Only or Off.
Medication Farm Level Usage Mode indicates whether farm usages will be created automatically when the Farm Receiving is posted.
Midpoint Rounding Method specifies how mathematical rounding methods should process a number that is midway between two numbers. Available options are Away From Zero and To Even.
If the Order History flag is selected, the user will be prompted for a reason code when changes are made to fields within Sales>Orders. *Note: this options does not apply to orders generated from Feed Order Planning, HIM Order Planning, or intercompany orders.
If the Order Shipment Auto Reference Number flag is selected, it instructs the program to generate the next sequential number. Reference number field will be read-only.
Payable Invoice Amount Tolerance determines the tolerance factor for the rounding difference in the Payable Invoice Amount in the invoice header to the Invoice Total Amount in the line details. The amount is entered in defined currency.
Precision Rounding (Currency) is used for all currency calculations, to define the number of digits to use for rounding.
Precision Rounding (Inventory) is used for all inventory values, to define the number of digits to use for rounding.
Precision Rounding (Unit Price) is used for all unit prices, to define the number of digits to use for rounding.
If the Product Receiving Auto Reference No flag is selected, it instructs the program to generate the next sequential number. Reference number field will be read-only.
Product Receiving Auto Reference No Counter Type is used when the Product Receiving Auto Reference No flag is selected, as it instructs the program to generate the next sequential number from Cost Center or Global.
Protein Cost Mode is used to specify the cost mode. Available options are:
Actual Cost - transfers during the period are recorded as accruals and reversed at period end, and true actual costs are calculated for the period.
Standard and Actual Cost - transfers during the period are recorded at standard cost. The period end process calculates the difference between actual and standard costs and processes the actual costs as adjustments to the standard costs, both of which then flow through inventory separately so that both actual and standard costs are reflected in the final product.
Standard Cost with Variance - transfers during the period are recorded at standard cost. The period end process calculates the difference between actual and standard costs and writes off the variance to variance accounts. Only the standard cost flows through inventory and is reflected in the final product cost.
Purchase Order Expiration Mode is used to select the PO expiration mode. Available options are End Receive Date or Indefinite.
Purchase Order Number Mode indicates the purchase order numbering mode. Available options are: Global Sequential, Manual or Vendor Sequential.
Purchase Order Remaining Balance Mode is used if the purchase order has a balance and it is tied to a purchase order contract. When the purchase order is closed, the balance will either remain with the purchase order, or the purchase order balance will be credited and the balance will be debited to the contract. Available options are Adjust Contract or Leave On Order.
Sales Invoice Date Mode is used to select the default invoice date. Available options are: Delivery Date, Invoice Creation Date or Ship Date.
Sales Contract Expiration Mode is used to select the contract expiration mode. Available options are Contract Expiration Date or Indefinite.
Sales Order Remaining Balance Mode is used if the sales order has a balance and it is tied to a sales contract. When the sales order is closed, the balance will either remain with the sales order, or the sales order balance will be credited and the balance will be debited to the contract. Available options are Adjust Contract or Leave On Order.
When the Unique Silo Code flag is selected, logic will enforce unique silo codes across all feed mills.

When the Warehouse/Farm Product Usage Auto Reference No flag is selected, the Auto Reference No instructs the program to generate the next sequential number. The reference number field will be read-only.
Selecting the Use ISO-8601 Week Numbers flag indicates that Week Number ISO-8601 should be used instead of Week Of Year procedure.
Vaccination Farm Level Usage Mode indicates whether farm usages will be created automatically when the Farm Receiving is posted.
Web Help Path indicates the location of the root folder of the Help files.
Week Ending Day indicates the week-ending day of the week.
In the System section, click the Period End child grid.

Future Date Limit is used to specify the number of days in the future when all records are all allowed to be posted past the current system date.
The Period End Tasks Company Mode flag specifies whether the period end tasks are run by the company or not.
Period End Mode specifies the period end calendar mode and methodology.
In the System section, click the Report child grid.

Default Report Header Image Path indicates the path the report builder will use to find the default image for the report output header.
The Poultry tab of the registry contains numerous components related to the different types of poultry:

The Broiler Breeder section contains the following components:
In the Broiler Breeder section, click the General child grid.

Breed Population Mode determines how the breed is assigned to the entity. Available options are:
Chick Placements - the breed for the entity will be determined based on the largest percentage of the breed placed in the chick placement.
Manual - the breed is manually assigned to the entity when the entity is created.
Egg Room Transfers Method defines which egg transfers method will be used to transfer eggs between hatcheries. Available options are Automated or Manual.
Feed Inventory Mode indicates if the feed inventory and consumption is recorded as single values for all feed by Formula, Feed Type or Single Inventory (Formula or Feed Type not required).
The Head Inventory Mode flag determines if the processing transaction allows more birds to be processed than in inventory. Available options are Allow Negative Inventory or Do Not Allow Negative Inventory.
Selecting the Inherit Entity User Fields flag instructs the program to inherit all the user fields defined from the previous entity.
Producer Contracts Mode indicates whether producer contracts are predefined at the contract level or can be configured at the farm level.
Selecting the Transfer Auto Reference No flag instructs the program to generate the next sequential number. The reference number field will be read-only.
If the Validate Placement Health Status flag is selected, the following logic applies based on the Placement Control Status defined on the Lab Test Code.
If the Placement Control Status is set to `Tracked`, the user will receive a warning message if the placement transaction does not meet the required days out established on the lab test code based on the farm or entity status of the prior entity.
BRPA will project placements based on the days out defined on the lab test code for the farm or entity status of the prior entity.
If the Validate Transfer Health Status flag is selected, the following logic applies based on the Control Status defined on the Lab Test Code.
If the Transfer Control Status is set to `No Transfer`, the transfer record cannot be posted.
If the Transfer Control Status is set to `Transfer to Same Status`, the transfer record will only post if the source and destination farm or entity has a Health Status of `Positive` for Lab Test Codes.
If the destination entity does not have the same lab test code status, then the transfer record cannot be posted.
In the Broiler Breeder section, click the Period End child grid.

BIM Farm Egg Room Mode determines if eggs produced are received into the farm egg room or are transferred directly to the hatchery egg room. Available options are Use Farm Egg Room or Direct Hatchery Deliveries.
Module Chick Cost Mode determines if chick costs are aggregated per hatchery or per division. Available options are Division or Hatchery
If the Combine Sex Separate Farm Allocations flag is selected, farm allocations will be allocated to both sexes on sex-separate farms.
Eggs Disposed Valuation Mode indicates if the cost of disposed eggs can be charged off to the current period to reduce egg costs or flowed through inventory to the hatchery. Available options are:
Charge Off To Current Period - credit inventory and debit COGS for value of eggs disposed.
Flow Through Inventory - inventory units are reduced but inventory value remains constant, thereby increasing the inventory unit cost. No journal entries are created.
Eggs Sold Valuation Mode indicates if the gain or loss from egg sales can be realized in the current period to reduce egg cost or flowed through inventory to the hatchery. Available options are:
Charges Off To Current Period - credit inventory and debit COGS for value of eggs sold.
Flow Through Inventory - inventory units are reduced but inventory value remains constant, thereby increasing the inventory unit cost. No journal entries are created.
End of Lay Variance Mode determines where the Capital Accounts variance at the end of the flock is posted to. Available options are: Egg Cost, Plant or System Variance Account.
Farm To Entity Feed Consumed Allocation Mode determines whether the feed consumed value is allocated to flocks on the basis of hen days or field transaction feed consumed units. Available options are Animal Days or Field Trans Feed Consumed Units.
Feed Consumed Shrink Mode is only used when the Feed Consumption Valuation Unit Type is set to Delivery And Inventories with Shrink. Available options are Charge To Current Period or Flow Through Inventory
Feed Consumption Valuation Unit Type can be derived from actual consumption entered in field transactions or beginning inventory plus deliveries minus ending inventory. Available options are:
Deliveries Only - feed consumption is calculated using accumulative feed deliveries. Any ending physical inventories are ignored.
Deliveries And Inventories - beginning inventory plus deliveries minus ending inventory.
Delivery And Inventories with Shrink - feed consumption is derived from beginning inventory plus deliveries minus ending inventory. The derived feed consumption is then adjusted based on field consumption entered in Field Transactions with the difference being adjusted to a shrink variance
Field Trans Accrual - feed consumption is derived from actual consumption entered in field transactions. Period end will reverse the accrual and record actual consumption based on feed deliveries and inventory.
Field Trans Journal - feed consumption is derived from actual consumption entered in field transactions.
Maximum Cost Center Threads is used to enter the maximum number of cost centers that will be processed concurrently by Period End processes.
Maximum Sub Threads is used to enter the maximum number of farms or entities that will be processed concurrently by Period End processes.
Movement Allocations Mode indicates the movement mode and daily allocations logic uses Entity Days or Animal Days as the weight factor, where Animal Days = Entity Days x Inventory. Available options are:
Animal Days - period units/dollars consumed are weighted to each day on the basis of daily animal inventory.
Entity Days - period units/dollars consumed are weighted equally to each day the entity is on premises.
Per Animal - period units/dollars consumed are distributed unequally through the period so that each animal in inventory for any duration in the period consumes an equal amount.
Period End Entity Granularity indicates the entity granularity used by Period End functions. Auto indicates all period end costs are distributed to the lowest granularity level for each entity. If House or Pen is selected, then all entities must have components at the indicated level. Available options are: Entity, House or Pen.
Pullet Sales Mode indicates if the credit revenue will be to inventory, or if the credit revenue will be to sales, and credit inventory for value sold with offset debit to COGS. Available options are Revenue To Inventory or Revenue To Sales and Inventory Value To COGS.
The Use Farm Feed Inventories flag determines whether the Feed Consumed task uses Farm Feed Inventories or retrieves physical inventories directly from Field Transactions.
In the Broiler Breeder section, click the Depreciation child grid.

Salvage Value Basis is calculated using either a value per head or a value per lb/kg. Available options are: Head, Percent of Capitalized Value or Weight.
Amortization Salvage Mode determines if amortization salvage value is calculated using projected flock-end bird inventories or current bird inventories. This is normally used in conjunction with Expense Inventory Depletion. Available options are: Current Beginning Inventory, Current Ending Inventory or Projected End Of Flock Inventory.
The Expense Inventory Depletion Through Mortality and Culling flag is used to write off capitalized inventory as depleted through culling or mortality. This is normally used when Amortization Salvage Mode = Current Ending Inventory.
The Expense Inventory Depletion Through Sales and Processing flag is used to write off capitalized inventory as depleted through sales and processing. This is normally used when Amortization Salvage Mode = Current Ending Inventory.
Depreciation Schedule Mode indicates if the depreciation schedules are linked by a product or by a flock. Available options are:
By Flock - requires every flock to have a depreciation schedule in the flock master.
By Product or By Flock - requires a depreciation schedule to be specified for every product, and optionally, individual flocks can override the product schedule by specifying an amortization schedule in the flock master.
If the Exclude Breeder Sales And Plant Transfers From Net Book Value flag is selected, breeder sales and plant transfers will be excluded from the net book value.
Periodicity indicates amortization calculation periodicity. It can be processed Monthly (monthly depreciation is processed as a single monthly period) or Weekly (processed as individual weeks).
In the Broiler Breeder section, click the Settlements child grid.

The Layers section contains the following components:
In the Layers section, click the General child grid.

Breed Population Mode determines how the breed is assigned to the entity. Available options are:
Chick Placements - the breed for the entity will be determined based on the largest percentage of the breed placed in the chick placement.
Manual - the breed is manually assigned to the entity when the entity is created.
Egg Room Transfers Method defines which egg transfers method will be used to transfer eggs between hatcheries. Available options are Automated or Manual.
Feed Inventory Mode indicates if the feed inventory and consumption is recorded as single values for all feed by Formula, Feed Type or Single Inventory (Formula or Feed Type not required).
The Head Inventory Mode flag determines if the processing transaction allows more birds to be processed than in inventory. Available options are Allow Negative Inventory or Do Not Allow Negative Inventory.
Selecting the Inherit Entity User Fields flag instructs the program to inherit all the user fields defined from the previous entity.
Producer Contracts Mode indicates whether producer contracts are predefined at the contract level or can be configured at the farm level.
Selecting the Transfer Auto Reference No flag instructs the program to generate the next sequential number. The reference number field will be read-only.
If the Validate Placement Health Status flag is selected, the following logic applies based on the Placement Control Status defined on the Lab Test Code.
If the Placement Control Status is set to `Tracked`, the user will receive a warning message if the placement transaction does not meet the required days out established on the lab test code based on the farm or entity status of the prior entity.
BRPA will project placements based on the days out defined on the lab test code for the farm or entity status of the prior entity.
If the Validate Transfer Health Status flag is selected, the following logic applies based on the Control Status defined on the Lab Test Code.
If the Transfer Control Status is set to `No Transfer`, the transfer record cannot be posted.
If the Transfer Control Status is set to `Transfer to Same Status`, the transfer record will only post if the source and destination farm or entity has a Health Status of `Positive` for Lab Test Codes.
If the destination entity does not have the same lab test code status, then the transfer record cannot be posted.
In the Layers section, click the Period End child grid.

LIM Farm Egg Room Mode determines if eggs produced are received into the farm egg room or are transferred directly to the hatchery egg room. Available options are Use Farm Egg Room or Direct Hatchery Deliveries.
Eggs Disposed Valuation Mode indicates if the cost of disposed eggs can be charged off to the current period to reduce egg costs or flowed through inventory to the hatchery. Available options are:
Charge Off To Current Period - credit inventory and debit COGS for value of eggs disposed.
Flow Through Inventory - inventory units are reduced but inventory value remains constant, thereby increasing the inventory unit cost. No journal entries are created.
Eggs Sold Valuation Mode indicates if the gain or loss from egg sales can be realized in the current period to reduce egg cost or flowed through inventory to the hatchery. Available options are:
Charges Off To Current Period - credit inventory and debit COGS for value of eggs sold.
Flow Through Inventory - inventory units are reduced but inventory value remains constant, thereby increasing the inventory unit cost. No journal entries are created.
End of Lay Variance Mode determines where the Capital Accounts variance at the end of the flock is posted to. Available options are: Egg Cost, Plant or System Variance Account.
Farm To Entity Feed Consumed Allocation Mode determines whether the feed consumed value is allocated to flocks on the basis of hen days or field transaction feed consumed units. Available options are Animal Days or Field Trans Feed Consumed Units.
Feed Consumed Shrink Mode is only used when the Feed Consumption Valuation Unit Type is set to Delivery And Inventories with Shrink. Available options are Charge To Current Period or Flow Through Inventory
Feed Consumption Valuation Unit Type can be derived from actual consumption entered in field transactions or beginning inventory plus deliveries minus ending inventory. Available options are:
Deliveries Only - feed consumption is calculated using accumulative feed deliveries. Any ending physical inventories are ignored.
Deliveries And Inventories - beginning inventory plus deliveries minus ending inventory.
Delivery And Inventories with Shrink - feed consumption is derived from beginning inventory plus deliveries minus ending inventory. The derived feed consumption is then adjusted based on field consumption entered in Field Transactions with the difference being adjusted to a shrink variance
Field Trans Accrual - feed consumption is derived from actual consumption entered in field transactions. Period end will reverse the accrual and record actual consumption based on feed deliveries and inventory.
Field Trans Journal - feed consumption is derived from actual consumption entered in field transactions.
Maximum Cost Center Threads is used to enter the maximum number of cost centers that will be processed concurrently by Period End processes.
Maximum Sub Threads is used to enter the maximum number of farms or entities that will be processed concurrently by Period End processes.
Movement Allocations Mode indicates the movement mode and daily allocations logic uses Entity Days or Animal Days as the weight factor, where Animal Days = Entity Days x Inventory. Available options are:
Animal Days - period units/dollars consumed are weighted to each day on the basis of daily animal inventory.
Entity Days - period units/dollars consumed are weighted equally to each day the entity is on premises.
Per Animal - period units/dollars consumed are distributed unequally through the period so that each animal in inventory for any duration in the period consumes an equal amount.
Period End Entity Granularity indicates the entity granularity used by Period End functions. Auto indicates all period end costs are distributed to the lowest granularity level for each entity. If House or Pen is selected, then all entities must have components at the indicated level. Available options are: Entity, House or Pen.
Pullet Sales Mode indicates if the credit revenue will be to inventory, or if the credit revenue will be to sales, and credit inventory for value sold with offset debit to COGS. Available options are Revenue To Inventory or Revenue To Sales and Inventory Value To COGS.
The Use Farm Feed Inventories flag determines whether the Feed Consumed task uses Farm Feed Inventories or retrieves physical inventories directly from Field Transactions.
In the Layers section, click the Depreciation child grid.

Salvage Value Basis is calculated using either a value per head or a value per lb/kg. Available options are: Head, Percent of Capitalized Value or Weight.
Amortization Salvage Mode determines if amortization salvage value is calculated using projected flock-end bird inventories or current bird inventories. This is normally used in conjunction with Expense Inventory Depletion. Available options are: Current Beginning Inventory, Current Ending Inventory or Projected End Of Flock Inventory.
The Expense Inventory Depletion Through Mortality and Culling flag is used to write off capitalized inventory as depleted through culling or mortality. This is normally used when Amortization Salvage Mode = Current Ending Inventory.
The Expense Inventory Depletion Through Sales and Processing flag is used to write off capitalized inventory as depleted through sales and processing. This is normally used when Amortization Salvage Mode = Current Ending Inventory.
Depreciation Schedule Mode indicates if the depreciation schedules are linked by a product or by a flock. Available options are:
By Flock - requires every flock to have a depreciation schedule in the flock master.
By Product or By Flock - requires a depreciation schedule to be specified for every product, and optionally, individual flocks can override the product schedule by specifying an amortization schedule in the flock master.
If the Exclude Breeder Sales And Plant Transfers From Net Book Value flag is selected, breeder sales and plant transfers will be excluded from the net book value.
Periodicity indicates amortization calculation periodicity. It can be processed Monthly (monthly depreciation is processed as a single monthly period) or Weekly (processed as individual weeks).
In the Layers section, click the Settlements child grid.

The Settlements Approval Flag indicates whether to enforce that the approval flag 1 is to be true before the approval flag 2 can be true.
Settlements Granularity indicates whether settlements are processed by division, growout area or plant.
The Broilers section contains the following components:
In the Broilers section, click the General child grid.

Breed Population Mode determines how the breed is assigned to the entity. Available options are:
Chick Placements - the breed for the entity will be determined based on the largest percentage of the breed placed in the chick placement.
Manual - the breed is manually assigned to the entity when the entity is created.
Feed Inventory Mode indicates if the feed inventory and consumption is recorded as single values for all feed by Formula, Feed Type or Single Inventory (Formula or Feed Type not required).
The Head Inventory Mode flag determines if the processing transaction allows more birds to be processed than in inventory. Available options are Allow Negative Inventory or Do Not Allow Negative Inventory.
Selecting the Inherit Entity User Fields flag instructs the program to inherit all the user fields defined from the previous entity.
Max Flock Age is used by different modules to filter flocks that should be inactive. This age should be set to a value 20-30% higher than flocks are normally sold.
Min Flock Age is used to enter the youngest age at which flocks can be scheduled for kill. The BRPA will select flocks before their target age if they match head and weight band target criteria, yet will not select any flock younger than min bird age.
If the Pen Master Validation flag is selected, this requires that pens can be created within the house master table for validating data entered at the pen level. This is only needed when granularity is set to F-E-H-P.
Producer Contracts Mode indicates whether producer contracts are predefined at the contract level or can be configured at the farm level.
Selecting the Transfer Auto Reference No flag instructs the program to generate the next sequential number. The reference number field will be read-only.
If the Validate Placement Health Status flag is selected, the following logic applies based on the Placement Control Status defined on the Lab Test Code.
If the Placement Control Status is set to `Tracked`, the user will receive a warning message if the placement transaction does not meet the required days out established on the lab test code based on the farm or entity status of the prior entity.
BRPA will project placements based on the days out defined on the lab test code for the farm or entity status of the prior entity.
If the Validate Transfer Health Status flag is selected, the following logic applies based on the Control Status defined on the Lab Test Code.
If the Transfer Control Status is set to `No Transfer`, the transfer record cannot be posted.
If the Transfer Control Status is set to `Transfer to Same Status`, the transfer record will only post if the source and destination farm or entity has a Health Status of `Positive` for Lab Test Codes.
If the destination entity does not have the same lab test code status, then the transfer record cannot be posted.
In the Broilers section, click the Period End child grid.

Farm To Entity Feed Consumed Allocation Mode determines whether the feed consumed value is allocated to flocks on the basis of hen days or field transaction feed consumed units. Available options are Animal Days or Field Trans Feed Consumed Units.
Feed Consumed Shrink Mode is only used when the Feed Consumption Valuation Unit Type is set to Delivery And Inventories with Shrink. Available options are Charge To Current Period or Flow Through Inventory
Feed Consumption Valuation Unit Type can be derived from actual consumption entered in field transactions or beginning inventory plus deliveries minus ending inventory. Available options are:
Deliveries Only - feed consumption is calculated using accumulative feed deliveries. Any ending physical inventories are ignored.
Deliveries And Inventories - beginning inventory plus deliveries minus ending inventory.
Delivery And Inventories with Shrink - feed consumption is derived from beginning inventory plus deliveries minus ending inventory. The derived feed consumption is then adjusted based on field consumption entered in Field Transactions with the difference being adjusted to a shrink variance
Field Trans Accrual - feed consumption is derived from actual consumption entered in field transactions. Period end will reverse the accrual and record actual consumption based on feed deliveries and inventory.
Field Trans Journal - feed consumption is derived from actual consumption entered in field transactions.
Maximum Cost Center Threads is used to enter the maximum number of cost centers that will be processed concurrently by Period End processes.
Maximum Sub Threads is used to enter the maximum number of farms or entities that will be processed concurrently by Period End processes.
Movement Allocations Mode indicates the movement mode and daily allocations logic uses Entity Days or Animal Days as the weight factor, where Animal Days = Entity Days x Inventory. Available options are:
Animal Days - period units/dollars consumed are weighted to each day on the basis of daily animal inventory.
Entity Days - period units/dollars consumed are weighted equally to each day the entity is on premises.
Per Animal - period units/dollars consumed are distributed unequally through the period so that each animal in inventory for any duration in the period consumes an equal amount.
Period End Entity Granularity indicates the entity granularity used by Period End functions. Auto indicates all period end costs are distributed to the lowest granularity level for each entity. If House or Pen is selected, then all entities must have components at the indicated level. Available options are: Entity, House or Pen.
The Use Farm Feed Inventories flag determines whether the Feed Consumed task uses Farm Feed Inventories or retrieves physical inventories directly from Field Transactions.

The Layer Breeder section contains the same fields as the Broiler Breeder section and information can be viewed there.
The Turkeys section contains the same fields as the Broilers section and information can be viewed there.
The Layer Breeder section contains the same fields as the Broiler Breeder section and information can be viewed there.
In Admin>System>Registry, click Poultry Registry.
Select the Poultry
tab and then click the Pmts child grid ![]() .
.
Click the Hatchery Period End (All Hatcheries) child grid to open it up.

By Product Costing Mode is only used when Protein Cost Mode = Actual Cost. By Products used a standard cost only when either of the two standard costs modes are selected for Protein Cost Mode. Available options are: By Products Transferred At Zero Cost, By Products Transferred Using Previous Month Broiler Cost, and Regraded By Products Transferred At Saleable Cost.
Farm Egg Inventory Mode determines where the flock farm inventory is used. Available options are Farm Egg Room or Field Transactions .
HIM Egg Transfers Sequence Mode specifies the hatchery sequence used to process inter-hatchery egg transfers. Available options are:
Auto Sequence - eggs may be transferred between any hatchery and any hatchery, but eggs may only be transferred once during a fiscal period.
Manual Sequence - supports multiple movements per period between hatcheries but only in the sequence specified in the hatchery facility master table.
HIM/EPS Costing Mode determines the costing method used. Available options are:
Average Cost - inventory losses charged to usage.
Average Cost Retain Losses - retain losses in current inventory.
FIFO - first in first out
Maximum Cost Center Threads is used to enter the maximum number of cost centers that will be processed concurrently by Period End processes.
Maximum Sub Threads is used to enter the maximum number of farms or entities that will be processed concurrently by Period End processes.
In Admin>System>Registry, click Poultry Registry.
Select the Poultry
tab and then click the Pmts child grid ![]() .
.
Click the Hatchery Planning (Target Shift) child grid to open it up.

Target Shift determines which direction to shift BRPA target dates to match a hatchery`s capacity. Available options are:
Future - shift BRPA targets to future dates when target egg usage falls on a hatchery on a day without capacity.
Past - shift BRPA targets to earlier dates when target egg usage falls on a hatchery on a day without capacity.
The Divisions tab contains all registry settings for the various divisions.
In Admin>System>Registry, click Poultry Registry.
Select the Divisions
tab and then click the Protein Division child grid ![]() .
.
Click the General child grid to open it up.

Entity Number Mode is used to select the entity number mode for each division.
If the Feed Product Prescription Required flag is selected, the program will validate medicated feed before it is used.
If the Field Product Prescription Required flag is selected, the program will validate medicated products before they are used.
The Feed Mills tab of the registry contains numerous components related to the different types of feed mills:

The FDSA section contains registry settings for use in the different feed mills.

Bin Adjustment Safety Factor modifies the bin capacity used for feed delivery calculations to minimize the delivery of too much feed to one bin.
Bin Capacity Mode uses the bin capacity based on the combination between the sex defined for each bin and the sex on the feed type that it is projecting, or use them all equal. Available options are:
Non Sex - instructs the FDSA to use the bin capacity for all active bins at the time.
Sex Definition - instructs the FDSA to use the bin capacity for all active bins at the time based on the sex type defined on each bin.
Bin Delivery Mode is used to select the projection house bin capacity utilization. Available options are:
Alternate Four Bins - instructs the FDSA to alternate bins for each feed delivery. Option will limit a delivery amount to the capacity of the following bin.
Always Alternate - instructs the FDSA to alternate bins for each feed delivery. Option will limit a delivery amount to the capacity of the opposite bin. Example: if the last delivery was to Bin 1, the next delivery will be to Bin 1, and vice versa.
First Bin Except First Delivery - delivers all feed to Bin A, except when an F Flag (First Delivery/Feed Type) is present
House Capacity - instructs the FDSA to maximize usage of bin capacities by utilizing both bins for a single delivery. Utilization of both bins is true for all deliveries with the exception of the first delivery of each feed type.
House Capacity Mixed Feed Types - the same as `House Capacity` except that it allows for different feed types to be mixed in one bin.
House Even Bin Ending Inventory - instructs the FDSA to balance all bin ending inventories. Mixed feed types are allowed in a single bin.
Compartment Rounding is used to enter the rounding factor for calculating `rounded` load amounts. Example: 3000 loads down to the nearest 3,000 LBS (KGS)
Feed Rounding Direction identifies the rounding direction. Available options are:
Round Combination - indicates to the program to round Up or Down the feed amount during the projection.
Round Down - indicates to the program to round Down the feed amount during the projection.
Round Up - indicates to the program to round Up the feed amount during the projection.
Feed Type Rounding Mode determines the rounding methodology used. If a feed delivery should consist of 12,000 lbs of which 3,000 lbs should Starter and 9,000 lbs should be Grower, Next Feed Type Mode determines which type of feed will be specified. Available options are: Advance To Next Feed Type, Extend Previous Type or Precise Feed Type Amounts.
Formula Assignment Effective Date Mode indicates the effective date moe of the formula assignment. Available options are:
Date Of Birth - this will link the entity being projected to the Formula Assignment Effective Date, based on the date of the birth of the Entity.
Projection Date - this will link the entity being projected to the Formula Assignment Effective Date, based on the projection date specified.
If the Harvest Date Delivery flag is selected, FDSA will schedule feed (if needed) on harvest date.
If the Limit Projection To Truck Capacity flag is selected, this will limit projected delivery amounts to the capacity of a single truck.
Load Compartment Rounding is used to enter the rounding factor for new loads. Example: 1,000 loads to the nearest 1,000 lbs.
Min Head Count For Rounding is used to enter the minimum head count before projection applies any amount rounding.
Min Percent Delivery is calculated from the percent of `Compartment Rounding`. Values are entered in percentages.
Next Feed Type Mode indicates the method for determining the feed type. Available options are:
Feed Program - will schedule feed type based on the program defined.
Stay on Previous Feed Type - will continue to use the previous feed type until the feed program changes feed types or a new feed type is delivered.
Projection Granularity Mode specifies the flock number format and the lowest level of data granularity tracked by the FDSA. Available options are: Entity, House or Pen.
Projection Mode is used to select the projection mode. Available options are:
Farm - allows for the projecting of all houses on a farm as a single unit. Each house will be analyzed for delivery requirements, yet a single projection record for the farm, identified as house `F`, will be displayed.
Farm House - projection will suggest a single delivery date for all houses on a farm based on the house with the lowest days to empty (or the house that will need feed first). A four house farm would have a single projected `next delivery` date with specific amounts projected to each house based on bin capacity as of the common delivery date.
House Independent - projection will suggest different delivery dates for each house based on independent house inventories (days to empty).
Rounding Dates Prior To Harvest is used to enter the number of days prior to harvest date where FDSA will no longer use `Compartment Rounding`.
Selecting the Split Projected Orders flag will split a projected order based on the truck capacity; otherwise it will create the order with the total projected amount.
Standard House Delivery is used to enter the standard house delivery amount, which is used in the projection to limit the amount of feed delivered to a house. This number will not overwrite the bin capacity.
Standard Truck Capacity is used to enter the maximum standard truck capacity.
System Delivery Rounding is used to enter the rounding factor for calculating `rounded` amounts when no compartment or feed job roundings are defined.
The BIM section contains registry keys used in all BIM transactions. *Note: Sections BRIM, GIM, LIM, SIM and TIM all contain identical fields to the BIM section.

The FMIM section contains registry settings related to feed.
In the FMIM section, click the General child grid.

Actual Adjustment Variance Mode determines what happens with the finished feed production variance incurred at the mill. It is either allocated to current period or it remains at the mill in a variance account. Available options are Excluded and Inventory.
Feed Formula Ingredient Breakdown Percent Rounding is used to enter the tolerance percentage, which is used to round the ingredient formulation to 100% on imported feed production transactions. An adjustment will be made to the ingredient with the highest usage percentage on the transaction.
Feed Formula Version Mode is used to select the mode for new formula versions. Available options are Unique or Unique By Date.
Feed Order Planning Date Validation is used to select the validation for the feed order planning date. Available options are:
Not Validated - all dates are modified with no restrictions. Dates are not considered dependent on other dates.
Validated - production and load dates are restricted by defined earliest and latest delivery dates.
If the Feed Trans Auto Reference No flag is selected, it instructs the program to generate the next sequential number. Reference number field will be read-only.
Formula Master Ingredient Usage Mode is used to select the mode to enter the ingredient breakdown in feed formula versions. Available options are Amount or Percent.
Feed Production Version Selection is used to select the mode to enter the formula version on feed selection records. Available options are Automatic Selection or Manual Selection.
Ingredient Receiving Auto Allocate Net Mode has three available options:
Auto - net weight will be distributed over multiple detail lines automatically.
Manual - net weight will not be distributed but will be entered manually over multiple detail lines.
Prompt - user will be prompted whether or not to distribute a new net value over multiple detail lines.
Ingredient Receiving Date Mode is used to select the mode to raw material transaction dates. Available options are Automatic Selection or Current Selection.
Inventory Cost Mode is used to determine inventory valuations, which can be determined using either `True FIFO` (First-In First-Out) or `Average Cost Basis` valuation/cost tracking.
Inventory Time Mode is used to determine the time mode. If Date Time is selected, the program will expect times entered for all transactions, and physical inventories will be taken a specific time. Available options are Date Only or Date Time.
Shrink Variance Mode is used to allocate the shrink adjustment to the feed formula costs or variance account for the period. Available options are:
Excluded - this mode determines the period cost of the feed formula before the shrink adjustment.
Inventory - this mode will allocate the shrink adjustment to the feed formula costs for the period.
Selecting the Unposted Product Cost Estimated Calculation flag will estimate ingredient and feed costs at the time of record creation, before global post, by calculating the current average inventory cost in the system. If the flag is not selected, the system will use a cost of zero before posting.
If the Validate Compound Formula Percent flag is selected, FMIM will validate that compound formulas equal 100% (Base formula + Additive).
Variance Account Mode determines if the variance account will be allocated to the ingredient costs for the period for average cost valuations. Available options are Excluded or Inventory.
In the FMIM section, click the Period End child grid.

FMIM OPS Allocation Mode determines if the system will process OPS allocations as a single aggregate value for OPS balance into all feed produced by each feed mill, or by account for each feed type or feed formula.
Global Post Price Generation is used to specify whether or not, and on what date to automatically generate ingredient and feed formula price records during the global price. if a price record exists with the specified date, the price will be overwritten with a new price. Add-ons will be copied from the most recent price record prior to the date for new records, or not changed if the record does not exist. Available options are: Current Period, Next Period or No Generation.
Global Post Mode determines the frequency of the shrink value calculations - weekly, monthly or dual. In dual modes, intermediate weekly values are obtained prior to month-end, and then at month-end, shrink is restated to a monthly basis. Available options are: Daily, Daily/Monthly, Daily/Weekly, Monthly, Weekly, Monthly/Weekly.
Physical Inventory Zero Default determines the default behavior when a physical inventory is not entered for an inventory item. Available options are:
Actual Physical Inventories Only - process only actual physical inventories
The Growouts tab contains numerous components

Click the Global
child grid to open it up.

Feed Inventory Valuation Mode determines if feed inventory at period end is valuated at average cost or using last delivery price.

Alternate Weight Basis is used for all alternate cost calculations. The denominator can be calculated using Total Weight - Total Condemn, Total Wight - Farm Condemn or Total Weight - Farm Whole Bird Condemn.
The BIM/LIM section contains numerous sub-sections:
Click the BIM/LIM child grid to open it up.
In the BIM/LIM
section, click the Eggs
child grid.

Dozens Print Mode is used to select the type of egg output desired. Individual Eggs = All Egg stats as individual eggs; Dozens = egg Counts (excluding eggs/hen) and feed and costs stats in dozens; or Combination Mode = egg counts in individual eggs, and feed and cost stats in dozens.
Egg Stats Mode is used to calculate egg statistics from farm production values or from hatchery deliveries and farm inventories.
In the BIM/LIM
section, click the Feed
child grid.

Feed Calculation Mode is used to determine if feed statistics are calculated from feeds delivered or feeds consumed as reported by the farm. Available options are Feed Consumed or Feed Delivered.
In the BIM/LIM
section, click the Field
child grid.

Selecting the Auto Calculate Cull Eggs flag will calculate total cull eggs from cull egg sub-categories.
Selecting the Auto Calculate Culls flag will calculate cull values by taking the total of all cull codes.
Selecting the Auto Calculate Hatch Eggs flag will calculate total hatch eggs from hatch egg sub-categories.
Selecting the Auto Calculate Mortality flag will calculate mortalities value by taking the total of all mortality codes.
When the Auto Calculate Total Eggs flag is selected, Total Eggs Produced and Total Eggs Inventory will be auto calculated and will cannot be edited. If the flag is not selected, Total Egg fields can be edited.
Default Production Days is used to define the default number of days when field transactions are created to represent the days of egg production.
When the Field Auto Reference No flag is selected, the program will be instructed to generate the next sequential number. Reference number field will be read-only.
Field Auto Reference No Counter Type is used if the Field Auto Reference No flag is selected, to define if the next sequential number should be generated from Cost Center or Global.
Uniformity Basis indicates the basis used in uniformity calculation. Available options are Samples or Weight.
Uniformity Range indicates the range factor used in uniformity and CV calculations.
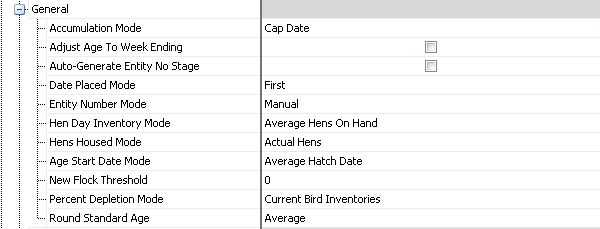
Accumulation Mode is used to select the accumulation mode desired. Available options are Cap Date, Day One or Specified Date.
The Adjust Age To Week Ending flag converts flock ages to week-ending ages regardless of the record date.
When the Auto-Generate Entity No Stage flag is selected, BPA Placements will auto-generate the Entity No based on the selected option in Registry>Growout>Entity Number Mode and append with one of the following selections: B=Brood, G=Grow, or L=Lay. If the flag is not selected, the Entity No will be generated based on the option selected in Registry>Growout>BIM/LIM Growout>General>Entity Number Mode.
Date Placed Mode contains two options:
Average - the program will update the entity with the weighted average date placed.
First - the program will update the flock with the first date.
Entity Number Mode contains numerous options:
Calendar Year - next entity for specified grower using digit and entity counter.
Fiscal Calendar - will utilize the two digit year identification plus sequence number per farm.
Global Auto Counter - will allow user to specify a base flock number, and then all flocks created in any module will be assigned the next sequential flock number.
Grower Auto Sequential - flock numbers will utilize a sequence number per farm.
Growout Area Auto Sequential - next sequential number for specified growout area.
Manual - will allow user to manually specify flock numbers for all flocks.
Modular Auto Counter - will allow user to specify a base flock number, and then all flocks created in the specific module will be assigned the next sequential flock number.
Hen Day Inventory Mode is used to select the hen inventory basis for hen day calculations. Available options are:
Average Hens On Hand - uses the number of females on hand during the period.
Beginning Inventory - uses the number at the beginning of the period
Ending Inventory - uses only the number at the end of the period.
Hens Housed Mode calculates Hens Houses and Hens Placed statistics using Adjusted Hens Housed and Placed or using Actual Hens Housed at Capitalization (or Placement for Day One Mode) and Actual Hens Placed at Day One.
Age Start Date Mode is an age calculation. Available options are: Average Date Placed, Average Hatch Date, First Date Placed or First Hatch Date.
New Flock Threshold identifies the number of weeks between the last flock and the new flock being created, that will tell the system whether or not to increment.
Percent Depletion Mode is used for depletion calculations. The program will divide by either head placed (flock not capitalized), head capitalized or beginning inventory. Available options are: Birds Placed Or Birds House, or Current Bird Inventories.
Round Standard Age controls which standard value is utilized when the entity age is not an even number of weeks old. Available options are:
Average - will calculate a weighted average standard from the preceding and succeeding standards, weighted by the day age offset.
Down - will round down to the preceding whole week age.
Up Or Down - will round up or down to the nearest whole week ago.
In the BIM/LIM
section, click the Point of
Lay child grid.

Point of Lay Base Mode for Week of Lay indicates the point of lay base mode for WOL. Available options are Age One or Age Zero.
Point of Lay Mode is used to select the point of lay mode. Available options are: Age, Date Cap, Date: Manual entry, First HE (Hatch Egg) or First TE (Total Egg).
Point of Lay Threshold is used to enter the age or level of production which represents the threshold at which point of lay is achieved.
Standard Age Basis matches the standard with a flock based on `Weeks In Lay`. Available options are Age or Point Of Lay.
In the BIM/LIM
section, click the Processing
child grid.

A House Detail Validation flag selected indicates that the transaction has house detail populated.
In the BIM/LIM
section, click the Transfer
child grid.
![]()
Single Transaction Ref No instructs the program to make the detail reference number the same as the header. Reference number field will be read-only at the detail level.
The registry settings for BPA Growout defines how the system will project egg, chick or broiler projections. The settings can be found in Admin>Systems>Registry>Poultry Registry>Growouts>PMTS Growout>BPA Growout>General.
Click the BPA Growout child grid and then click the General child grid to open it up.

Selecting the Adjust Imported Hatchability to Saleable flag indicates that flock data hatch statistics imported from the BIM will be adjusted to % Saleability (% Yield) by multiplying actual hatchability by the standard for Weekly % Saleable Chicks (uses BIM Standards tables).
Average Variance Data Points is the number of data points (weeks) required to calculate the average variance from standard for the projection. *Notes: This is linked to Projection Method when set for Average Variance. The more data points there, the longer it will take the system to react to change. At the same time 1 data point may not be enough.
Date Alignment is used for Entity Histories. When importing and editing, the data will be imported and displayed as Birth Date or Week Ending Date:
Week Ending Date - data will be displayed based on the weekending date.
Birth Date - data will be displayed bases on the birth date of the entity.
Production Projections Mode assigns the method in how the system will calculate bird inventory available to product eggs.
Hen Day - utilizes actual mortality or BPA Standard mortality percentages to calculate weekly hen inventory. The system assumes BPA Standard Production percentages do not include mortality factors.
Hen Capped - utilizes hens capitalized to calculate egg production. The system assumes BPA Standard Production percentages include mortality factors.
Standard Effective Date Alignment assigns how the standards will be applied to the entity. Available options are:
Hatch Date - applies the standard Effective Date based on the hatch date of the entity.
POL Date Mode - applies the standards Effective Date based on the POL of the entity. *Note: If there is no POL Date on the entity history record, the Effective Date will default to Hatch Date Mode.
Post Peak Adjustments Points is the number of data points (weeks) required to calculate the Regression Line from standard for the projection. *Note: This is linked to Projection Method when set for Regression Line. The more data points you have the longer it will take the system to react to change. At the same time 1 data point may not be enough.
Projection Method - assigns the method to calculate projections. Available options are:
Average Variance - based on averages and percents difference from BPA Standards.
Regression Line - uses statistical equations to return the variance between standards and actual performance.
The BRIM/TIM section contains numerous sub-sections:
Click the BRIM/TIM Growout child grid to open it up.
In the BRIM/TIM
section, click the Feed
child grid.

Feed Calculation Mode is used to determine if feed statistics are calculated from feeds delivered or feeds consumed as reported by the farm. Available options are: Feed Consumed, Feed Delivered or Feed Delivered Include Inventory.

In the BRIM/TIM section, click the General child grid.

Age Days Adjustment is used when calculating entity age; the program will adjust final calculation by the adjustment specified.
Bird Day Inventory Mode is used to select the bird inventory basis for bird day calculations. Available options are:
Average Hens On Hand - uses the number of birds on hand during the period.
Beginning Inventory - uses the number at the beginning of the period
Ending Inventory - uses only the number at the end of the period.
Entity Number Mode contains numerous options:
Calendar Year - next entity for specified grower using digit and entity counter.
Fiscal Calendar - will utilize the two digit year identification plus sequence number per farm.
Global Auto Counter - will allow user to specify a base flock number, and then all flocks created in any module will be assigned the next sequential flock number.
Grower Auto Sequential - flock numbers will utilize a sequence number per farm.
Growout Area Auto Sequential - next sequential number for specified growout area.
Manual - will allow user to manually specify flock numbers for all flocks.
Modular Auto Counter - will allow user to specify a base flock number, and then all flocks created in the specific module will be assigned the next sequential flock number.
Head Sold Mode is used to indicate whether farm head counts will be manually entered, or calculated by subtracting mortality from the head placed.
Age Start Date Mode is an age calculation. Available options are: Average Date Placed, Average Hatch Date, First Date Placed or First Hatch Date.
New Flock Threshold identifies the number of weeks between the last flock and the new flock being created, that will tell the system whether or not to increment.
PEF Age Input Rounding Precision is used to enter the number of decimals rounding precision used internally by the BRIM Standard Performance Index (BSPI) calculation for the Age input value.
PEF FCR Input Rounding Precision is used to enter the number of decimals rounding precision used internally by the BRIM Standard Performance Index (BSPI) calculation for the FCR input value.
PEF Livability Input Rounding Precision is used to enter the number of decimals rounding precision used internally by the BRIM Standard Performance Index (BSPI) calculation for the Livability input value.
PEF Weight Input Rounding Precision is used to enter the number of decimals rounding precision used internally by the BRIM Standard Performance Index (BSPI) calculation for the Weight (Mass) input value.
Round Standard Age controls which standard value is utilized when the entity age is not an even number of weeks old. Available options are:
Average - will calculate a weighted average standard from the preceding and succeeding standards, weighted by the day age offset.
Down - will round down to the preceding whole week age
Up Or Down - will round up or down to the nearest whole week ago
Standard Cost Mode is used when calculating standard cost; the program can use `standard unit costs` defined in the standards table to calculate standard amount or standard `journal transactions`.
In the BRIM/TIM section, click the Processing child grid.

Adjusted Standard Weight Factor is used to enter the factor for calculating statistics adjusted to a standard weight.
Adjusted Weight Basis is used for calculating statistics adjusted to a standard weight. Default = 4.25 (1.8 for metric setting).
A House Detail Validation flag selected indicates that the transaction has house detail populated.
In the BRIM/TIM section, click the Transfer child grid.
![]()
Single Transaction Ref No instructs the program to make the detail reference number the same as the header. Reference number field will be read-only at the detail level.
Click the Processing child grid to open it up.

Selecting the Catch Mortality flag means that catch mortalities are credited to farm head and weight.
Fuel Economy is used to enter the fuel economy rate. Zero equal no live haul adjustment, while any other value adjusts tare weights to reflect fuel consumption during live haul.
Fuel Weight indicates the fuel weight to adjust live haul weights.
Head Count Basis uses farm or head sold counts in general calculations.
Processing Allocation Mode is used to select the methodology for allocating the total net weight on a processing transaction to individual houses. Available options are:
Head Count - allocates the weight based on the total head of each house as a percentage of the total ticket weight.
Projected - allocates the weight to the houses using the projected average weight of each house
Processing Transfer Price Basis uses head or weight when calculating transfer amounts from the farm to the processing unit.
Processing Unit Cost Basis uses farm or plant weights in general calculations.
Click the Condemnations child grid to open it up.

Selecting the Auto Reference No flag instructs the program to generate the next sequential number. Reference number field will be read-only.
Condemnation Transaction Edit Mode specifies whether condemn weights are calculated automatically or will be entered manually by the user.
Condemnation Transfer Price Basis determines the calculation categories that are deducted from the processing revenue. The deduction will based on head or weight as defined in Processing Transfer Price Basis. Available options are:
All - deducts the value of all calculation categories.
All + DOA - deducts the value of all calculation categories including DOA.
Farm - deducts only condemnations where the calculation category is set to Farm.
Farm + DOA - deducts only condemnations where the calculation category is set to Farm (includes DOA).
None - there is no amount deducted from the processing revenue for condemnations
Plant - deducts only condemnations where the calculation category is set to Plant.
Plant + DOA - deducts only condemnations where the calculation category is set to Plant (includes DOA).
Flock Condemnation Weight Mode indicates if condemnation weights are based upon either Processing transactions matched by Flock, Date, Plant, Shift No and Lot No or by Entity (Flock Only).
If the Include Head Equivalent in Condemn Percent flag is selected, the head equivalent for parts weight will be included to calculate percent condemn.
If the One Half Parts Condemn flag is selected, this indicates that Farm Condemn Weight and Plant Condemn Weight are calculated using one-half of parts condemn.
Percent Condemn Mode specifies whether percent condemn is calculated using condemnation weight or head.
The Use Alternate Cond Category Alt Weight flag will calculate the condemn weight used to `Alternate Weight` using `Alternate Farm Condemn Category Definitions`.
The Use Alternate In Flock Weight After Condemn flag will use `Alternate Weight` for the calculation of `Flock Weight After Condemn`.
If the Use Feed Conv Alt Weight flag is selected, alternate weight will be used instead of total live weight for feed and caloric conversion calculations.
The Plants tab contains numerous components

The BRPA Plant section contains all registry settings related to BRPA plants.
Click the BRPA Plant child grid and then click the General child grid to open it up.

Click the Protein General child grid.

The LHS Plant section contains numerous sub-sections:
Click the LHS Plant child grid to open it up.
In the LHS Plant section, click the General child grid.

In the LHS Plant section, click the Crews child grid.

In the LHS Plant section, click the Drivers child grid.

In the LHS Plant section, click the Vehicles child grid.

The Labs tab contains a registry setting relating to the lab.

Selecting the Lab Auto Reference No flag instructs the program to generate the next sequential number. Reference number field will be read-only.
The Hatcheries tab contains numerous components related to the HIM transactions.
In Admin>System>Registry, click Poultry Registry.
Select the Hatcheries
tab and then click the HIM child grid ![]() to open
it up.
to open
it up.

Click the Base Hatchability child grid.

Default Projected Hatchability is the projected hatch used when no standard is defined in the entity
Hatchability Date Mode determines the hatchability statistics, which are tied to the hatch date of the chicks. the set date of eggs, or the production date of the eggs.
Hatches is the number of hatches the base hatchability percent calculation uses to adjust the standard.
Projected Egg Age Decline Mode uses egg age hatch decline factors defined for each individual breed, or one set of factors for all breeds. Available options are:
Single Standard - decline percent is obtained from master table.
Standards By Breed - decline percent is obtained from breed master table for specified entity.
Projection Hatchability Mode estimates the base projected hatchability, which can be done using three algorithms:
Adjusted Flock Standards - compares the flock`s previous three hatches to a standards table, and estimates hatchability for a group of eggs based upon that comparison.
By Product No -
Fertility - estimates expected hatchability based upon the most recent fertility information for the flock.
Use Standard Until Age specifies the age at which the Base Hatchability calculation will use Standard Hatch % ONLY until 0 is the default, and will include Standard Hatch % and Actual Hatches for all.
Click the Breakout child grid.

Selecting the Breakout Auto Reference No flag instructs the program to generate the next sequential number. Reference number field will be read-only.
Default Sample is the default sample number used when creating new breakout transactions
Breakout Match Mode specifies the mode for selected eggs for the breakout to be matched to the eggs transferred. This option is used for reporting only and does not apply to the Recalculate Hatchability process. Available options are: Entity + Last Breakout Trans, Entity + Production Date, Entity + Set Date, Entity + Set Date + Machine Number, Entity + Weekly Production Date or Entity + Weekly Set Date.
If the Candle All Egg Production Dates flag is selected, this means fertile egg estimates use all egg production dates. If the flag is not selected, fertile egg estimates are restricted to the specific eggs with the precise production date.
Candling Days is the number of days after set.
Total Fertility Mode determines the fertility mode in calculations using fertility. Available options are:
Total Fertility - only include breakout categories marked as `Include in Total Fertility`.
True Fertility - only include breakout categories marked as `Infertile`.
The Use Fertility Estimates flag will be selected when Fertile Eggs and derivative statistics will use `estimated` fertility when no candling transaction is available for a specific egg production date. The estimate is based upon a comparison of previous fertility measurements to standards, and optionally, when no previous fertility measurements are available, will be only on standard fertility.
Selecting the Validate Residue Autopsy Categories flag validates that the residue autopsy entries are not greater than the residue mortality categories.
Selecting the Validate Residue Mortality Categories flag validates that the residue mortality entries are not greater than the main categories.
Click the Chick child grid.

Selecting the Breeder Chick Inventory flag will force all breeder chick placements to be validated against an actual hatchery chick inventory.
If the Breeder Chick Inventory Sex Validation flag is not selected, this allows the hatchery to place any sex to a house regardless of the entity master sex when selected parent detail.
Selecting the Broiler/Layer Chick Inventory flag will force all broiler/layer chick placements to be validated against an actual hatchery chick inventory.
If the Broiler/Layer Chick Inventory Sex Validation flag is not selected, this allows the hatchery to place any sex to a house regardless of the entity master sex when selected parent detail.
Selecting the Chick Auto Reference No flag instructs the program to generate the next sequential number. Reference number field will be read-only.
If the Chick Cost By Hatchery flag is selected, the program will set the hatchery code as a required field when entering BIM chick costs.
If the Define Brpa Plant No flag is selected, the program will display a plant field to specify the destination plant to be used by BRPA. When projecting the harvest schedule, BRPA will use the specified plant and ignore the primary plant specified in the Farm master. The Plant field in chick transactions becomes a required field.
Held Over Days is the number of days that chicks are available after hatch for inventory usage.
Click the Egg Set Trans child grid.
![]()
Incubation Days is the number of default incubation dates.
A Setter No Validation selected flag validates that the Setter No is populated.
Standard Egg Age Set indicates the egg age at which eggs are set `on average`. BIM flock standards are also calibrated to this value.
Click the Egg Trans child grid.
![]()
Selecting the Auto Reference No flag instructs the program to generate the next sequential number. Reference number field will be read-only.
Auto Reference No Counter Type is used when the Auto Reference No flag is selected, as it instructs the program to generate the next sequential number from Cost Center or Global.
Average Egg Delivery Age is the average age of eggs when they are picked up. The default production date will be set using this parameter.
Max Egg Age Inventory Reduction indicates the maximum age an egg can reach before it is considered unusable for HIM projections calculations.
Min Flock Delivery Age (weeks) is the minimum flock age when eggs are delivered to the hatchery.
Min Storage Capacity identifies the minimum number of eggs that must remain in the hatchery egg room inventory at all times.
Tracking No
Mode indicates if the Tracking No for egg transactions will
be automatically generated by the system or manually entered by the
user.
Click the Hatch child grid.

If the Chicks Hatched Total Chicks Mode flag is selected, the Chicks Hatched screen will display a Total Chicks Hatched field and logic will take the total and subtract all other categories, then auto calculate the sexor culls.
Cull Chicks Formula Mode is used to select the formula for calculating percent cull chicks. Available options are: Cull Chicks Per Adjusted Eggs Set, Cull Chicks Per Chicks Hatched, Cull Chicks Per Eggs Set, Cull Chicks Per Saleable Chicks or Cull Chicks Per Sexed Chicks.
Chick Dispatch Calculation Mode determines which chicks are included in the chicks dispatch screen. Available options are Saleable and By-Products or Saleable Only.
Chick Dispatch Percent Female is the percent of the projected chicks that are female.
Hatch Transfer Mode determines the method of hatch transfers. Available options are:
Auto - creates all hatch records when the Machine Transfers record is created.
Manual - will require to select all eggs to be transferred from the hatcher to the hatch transaction.
Saleable Chicks
Formula Mode determines the method for the saleable chicks
formula. Available options are: Saleable Chicks Per Adjusted Eggs
Set, Saleable Chicks Per Chicks Hatched, Saleable Chicks Per Egg Set
Minus Graded or Saleable Chicks Per Egg Set.
Click the Period End child grid.

Chicks Disposed Valuation Mode indicates if the cost of disposed chicks is charged off to the current period or flowed through inventory to internal chick placements.
Chicks Sold Valuation Mode indicates if the gain or loss from chick sales is realized in the current period or flowed through inventory to internal chick placements.
Chick Stage To Entity Allocation Mode specifies the units basis for chick inventory allocations for stage to entity allocations. Available options are Available Units (Beginning Inventory + Units Received into inventory) or Units Received into Inventory.
Eggs Disposed Valuation Mode determines if the cost of disposed eggs is charged off to the current period or flowed through inventory to chick cost.
Eggs Downgraded Valuation Mode determines if the cost of downgraded eggs is charged off to the current period or flowed through inventory to chick cost.
Eggs Sold Valuation Mode determines if the gain or loss from egg sales is realized in the current period or flowed through inventory to chick cost.
Egg Stages To Entity Allocation Mode specifies the units basis for Egg Room, Setter and Hatcher allocations for stage to entity allocations.
Embryos Sold Valuation Mode determines if the gain or loss from embryo sales is realized in the current period or flowed through inventory to chick cost.
Parent Generation Offspring Cost Mode determines if Chick/Poult costs for parent generation offspring are calculated as an average per breed or as a single average for all breeds. *Note: Commercial breeds are excluded from this switch and always use a per breed average.
Click the Setter Transfer child grid.
![]()
A Hatcher No Validation selected flag validates that the Hatcher No is validated.
Setter Transfer Mode determines the method of setter transfers. Available options are:
Auto - creates all hatcher and chicks hatched records at set time.
Manual - will require to select all eggs to be transferred from the setter to the hatcher.
Transfer Days is the number of days after set when eggs are transferred.
The Product Type tab contains registry settings related to the protein
product transactions.
In Admin>System>Registry, click Poultry Registry.
Select the Product
Type tab and then click the Protein Product Type child grid
![]() to open it up.
to open it up.
Click the General child grid.

If the Automatic Intercompany Purchase Invoice flag is selected, purchase invoices will be automatically generated for intercompany transactions.
If the Automatic Sales Invoice flag is selected, sales invoices for approved orders will be automatically created when the order shipment is posted. Intercompany sales orders will be automatically approved for invoicing and if the order has an undefined unit price, the transaction cannot be posted until pricing is established.
Facility Transfer Receiving Mode determines the method of facility transfer receivings. Available options are:
Auto - transfers automatically generate recevings upon completion of the shipment.
Manual - transfers must be manually received.
Prompt - when the shipments are complete, the program provides an option to generate the receiving transaction or allow the user to manually create it later.
PO Invoice Percent Approval Threshold is the approval percent variance allowed when entering PO invoices. Amount outside of specified threshold will require manual approval.
Receiving Units Mode is used to select the mode to display units when receiving products from available purchase order list. Available options are Inventory Units or Vendor Units.
Sales Invoice Mode determines if sales invoices for the product are created internally by MTech, or by an external system and validation occurs for them.
Transfer Cost Mode determines if transfer prices are created in detail or summary using internal prices set by the product.
The Mobile tab contains registry settings related to transactions created with a mobile device, and contains the following components:
In Admin>System>Registry, click Poultry Registry.
Select the Mobile
tab and then click the Grower App child grid ![]() to open it up.
to open it up.

The BIM section contains registry setting related to the BIM field transactions.
In the BIM section, click the Field Trans child grid.
![]()
Brood Protein Entity Granularity Filter specifies the granularity of brood entities available. Available options are: All, FF, FF/FFH, FFH, FFH/FFHP or FFHP.
History Retention (Days) is the number of days worth of field transactions to store.
If the Include Non-mobile Transactions flag is selected, the system will include field transactions that did not originate from a mobile device.
Lay Protein Entity Granularity Filter specifies the granularity of lay entities available. Available options are: All, FF, FF/FFH, FFH, FFH/FFHP or FFHP.
Manager Mode Threshold is the maximum number of farms that will be pre-loaded.
The BRIM section contains registry setting related to the BRIM field transactions.
In the BRIM section, click the Field Trans child grid.
![]()
History Retention (Days) is the number of days worth of field transactions to store.
If the Include Non-mobile Transactions flag is selected, the system will include field transactions that did not originate from a mobile device.
Manager Mode Threshold is the maximum number of farms that will be pre-loaded.
Lay Protein Entity Granularity Filter specifies the granularity of entities available. Available options are: All, FF, FF/FFH, FFH, FFH/FFHP or FFHP.